Step 1: Sign Up and Create a User Account
To get started with FITOS, the first step is to sign up and create a user account. This process is straightforward and will provide you with access to all the features and tools necessary for garment design and production management. Visit the registration page and fill in the required fields, including your name, email address, and a secure password. Once you submit your information, you’ll receive a confirmation email to verify your account.
Please check your spam folder if you can’t find the verification code email in your inbox.
After verification, you can log in and explore the intuitive dashboard that FITOS offers. This dashboard is designed to guide you through the platform’s various features, making it easy to manage your projects and collaborate with others. Whether you’re a beginner or an experienced professional, having an account allows you to save your work, access libraries, and utilize all the functionalities that FITOS has to offer. Sign up today and begin your journey in the fashion industry with FITOS!


Step 2: Prepare Libraries
Preparing Libraries in FITOS allows you to organize and manage essential resources such as palettes, seams, stitches, images, and documents. Libraries act as a centralized repository where you can store and access all the elements needed for your designs and production processes. To prepare a library, simply navigate to the relevant section—whether it’s Palettes, Seams, or any other library—and click on “Create New.” This opens up a form where you can define and add items specific to that category.
Material Library

Supplier Library
Color Library

Palette Library
Seams Library

Stitches Library
Images & Documents Library

Once the library is prepared, you can easily edit, update, and delete items as needed, ensuring that your resources remain current and aligned with your project requirements. Libraries in FITOS are designed to streamline the creative and production workflow, offering a structured way to access the materials that bring your designs to life.
Step 3: Create and Manage Styles
Creating a Style in FITOS is the starting point for bringing your design ideas to life. A “Style” in FITOS refers to a garment concept that can be developed and managed from initial inspiration through to production. To create a new Style, navigate to the Styles section and click on “Create New.” This will open a form where you can input essential details such as the style name, description, and any relevant imagery or design files.
You can then further define the Style by adding size ranges, colors, materials, and other key specifications. FITOS provides flexibility, allowing you to customize each element according to your design vision. Once your Style is created, you can easily manage its progress, track updates, and connect it to other parts of your workflow, such as tech packs, product lines, and seasons.
Step 4: Invite Collaborators
Inviting collaborators in FITOS is a seamless way to bring your team or external partners into the design and production process. Whether you’re working with designers, manufacturers, or other stakeholders, FITOS enables smooth collaboration by allowing you to share specific styles, tech packs, and project details securely.

FITOS keeps everything centralized, so all parties can track changes, give feedback, and ensure that everyone is aligned on the project’s progress. This collaborative feature promotes clear communication, reduces missteps, and speeds up the workflow by enabling real-time input from all your collaborators.
Step 5: Generate a Tech Pack
Generating a Tech Pack in FITOS is a straightforward and efficient process designed to help you communicate your design specifications clearly and effectively to manufacturers. A tech pack is a vital document that contains all the essential details about a garment, including measurements, materials, construction methods, and any special instructions for production. FITOS simplifies this process by guiding you step-by-step through the creation of your tech pack.
![{"type":"elementor","siteurl":"https://help.fitos.io/wp-json/","elements":[{"id":"9405f70","elType":"widget","isInner":false,"isLocked":false,"settings":{"content_width":"full","editor":"Creating a New StyleStyle Details BOM Tab CreationStyle Details Colorways Tab CreationStyle Details Measurements Tab CreationStyle Details Pattern Tab CreationStyle Details Construction Tab CreationStyle Details Attachments Tab CreationStyle Details Discussion Chat In the Manage Styles tab, you will see a button at the top right of the page - + Create New When you click on this +Create New button, you will get 2 options – Create from Scratch and COPY A STYLE.Create Style from Scratch – If you choose “CREATE FROM SCRATCH”, then you will need to enter required fields as shown below.The options in the 'Category' and 'Silhouette' dropdown fields will update dynamically based on the selected 'Garment Type.If user select Garment Type as Topwear thenSize Range – Based on the size chart choice, all possible values are shown in Size Range drop down field. Users can select sizes in which the style will need to be designed for. It’s dropdown shown belowSample Size – Based on the selected values in Size Range, user can select the Sample Size for Points of Measure reference.On clicking Create, the page is redirected to My Styles : List View pageCreated Styles will be shown in My Styles : List View page as belowCreated Styles will be shown in My Styles : Card view page as belowCopy a StyleSelect a style that you would like to copy by clicking “Copy Style” in that style’s card. Then edit the Style Name, select the style features you would like to copy and click on Create buttonClick on Create button on Copy Style popupClicking on Create button will navigate to My Styles : List View page where the newly created style will be shown in both My Styles : List View and My Styles : Card View as shown in above section.View Style Details : Click on required style to navigate to 'My Style' in view mode.Edit Style DetailsThere are 3 ways to edit Styles.Click on the Edit icon (highlighted in the screenshots below) in My Styles: List view screen:Second way is to click at the top of View Style details screen to open the Style in edit mode.Third possibility is to click on edit Styles is by clicking on edit button from My Styles: Card viewStyle – In Style Edit mode, all fields except ID can be edited. The form opens as shown below. Style is a unique, system generated Identifier.Click on edit button which is at top right side of the page to add or update values in Style tabsBOM : click on BOM tabClick on +Add New buttonClicking on +Add New button will open Add BOM popupClicking on +Add New button will open Add BOM popup of selected Material and required valuesColorways : Click on Colorways tabClick on +Add New buttonClicking on +Add New button will open Add Colorways button Colorways buttonEnter required palettes from popupClick on Add Colorways buttonClicking on Add Colorways button will add selected palettes in Colorways tabMeasurementsClick on the 'Generate Measurements' buttonClicking on the 'Generate Measurements' button will display specific Points of Measure (POM) in a popup windowClick on Save button to add selected Points of Measure (POM) to the Measurement tableIf the user needs to select only specific Points of Measure (POM) from the popup, they must first click the 'Deselect All' checkbox and then choose the required POMsClick the 'Add New' button if the user wants to add new measurements.Add the field values as shown below and click on Add Measurements buttonClicking on Add Measurements button will add selected POM in the tableNote: The Size Configuration and Size Range shown here come from Style Tab. If you would like to update this data, please change them in Style tab.Pattern : click on Pattern tabclick on Upload button and select required imageClick on Upload buttonClicking on Upload button will add CAD Pattern in Pattern tabClick on +Add New buttonClick on +Add New button and enter required valuesClick on Add Pattern buttonUser can able to change the order of patternsConstructionClick on +Add New buttonClicking on +Add New button will open Create Operation popup -> fill all the required fields and click on Add buttonClicking on Add button will add the entered Operation in the Construction tableAttachments : click on Attachments tabClick on +Add New buttonClick on Upload button and select required imageClick on Add Attachment buttonDelete StylesDelete StylesThere are 3 ways to delete StyleFirst possibility to delete Style is by clicking on Delete button (highlighted in the screenshot below) from My Styles: List view pageSecond possibility is by clicking on Delete button (highlighted in the screenshots below) which is at top right side of Style Details page in view modeThird possibility is by clicking on Delete button (highlighted in the screenshot below) on the card in My Styles : Card view pageSearch Functionality : The search functionality allows users to find specific items using both list view and card view display options. Users can choose their preferred view to explore search results in a format that best suits their needs.Search functionality in My Styles: List ViewEnter keyword in search bar to filter required itemSearch functionality in My Styles: Card ViewEnter keyword in search bar to filter required itemGenerate TechpackThere are 3 ways to generate Techpack.The first possibility to generate Techpack is available in the My Styles : List View by clicking on Techpack button (highlighted in the screenshot below) which is showing in Actions columnSecond is to click on Techpack button (highlighted in the screenshot below) which is in the view/edit Style Details screen, at the top of the page.The third possibility to generate Techpack is available in the My Styles : Card View by clicking on three dots which is showing at bottom of the card and click on Generate Techpack button (highlighted in the screenshot below)","drop_cap":"","text_columns":"","text_columns_tablet":"","text_columns_mobile":"","column_gap":{"unit":"px","size":"","sizes":[]},"column_gap_tablet":{"unit":"px","size":"","sizes":[]},"column_gap_mobile":{"unit":"px","size":"","sizes":[]},"align":"","align_tablet":"","align_mobile":"","text_color":"","typography_typography":"","typography_font_family":"","typography_font_size":{"unit":"px","size":"","sizes":[]},"typography_font_size_tablet":{"unit":"px","size":"","sizes":[]},"typography_font_size_mobile":{"unit":"px","size":"","sizes":[]},"typography_font_weight":"","typography_text_transform":"","typography_font_style":"","typography_text_decoration":"","typography_line_height":{"unit":"px","size":"","sizes":[]},"typography_line_height_tablet":{"unit":"em","size":"","sizes":[]},"typography_line_height_mobile":{"unit":"em","size":"","sizes":[]},"typography_letter_spacing":{"unit":"px","size":"","sizes":[]},"typography_letter_spacing_tablet":{"unit":"px","size":"","sizes":[]},"typography_letter_spacing_mobile":{"unit":"px","size":"","sizes":[]},"typography_word_spacing":{"unit":"px","size":"","sizes":[]},"typography_word_spacing_tablet":{"unit":"em","size":"","sizes":[]},"typography_word_spacing_mobile":{"unit":"em","size":"","sizes":[]},"text_shadow_text_shadow_type":"","text_shadow_text_shadow":{"horizontal":0,"vertical":0,"blur":10,"color":"rgba(0,0,0,0.3)"},"drop_cap_view":"default","drop_cap_primary_color":"","drop_cap_secondary_color":"","drop_cap_shadow_text_shadow_type":"","drop_cap_shadow_text_shadow":{"horizontal":0,"vertical":0,"blur":10,"color":"rgba(0,0,0,0.3)"},"drop_cap_size":{"unit":"px","size":5,"sizes":[]},"drop_cap_space":{"unit":"px","size":10,"sizes":[]},"drop_cap_border_radius":{"unit":"%","size":"","sizes":[]},"drop_cap_border_width":{"unit":"px","top":"","right":"","bottom":"","left":"","isLinked":true},"drop_cap_typography_typography":"","drop_cap_typography_font_family":"","drop_cap_typography_font_size":{"unit":"px","size":"","sizes":[]},"drop_cap_typography_font_size_tablet":{"unit":"px","size":"","sizes":[]},"drop_cap_typography_font_size_mobile":{"unit":"px","size":"","sizes":[]},"drop_cap_typography_font_weight":"","drop_cap_typography_text_transform":"","drop_cap_typography_font_style":"","drop_cap_typography_text_decoration":"","drop_cap_typography_line_height":{"unit":"px","size":"","sizes":[]},"drop_cap_typography_line_height_tablet":{"unit":"em","size":"","sizes":[]},"drop_cap_typography_line_height_mobile":{"unit":"em","size":"","sizes":[]},"drop_cap_typography_word_spacing":{"unit":"px","size":"","sizes":[]},"drop_cap_typography_word_spacing_tablet":{"unit":"em","size":"","sizes":[]},"drop_cap_typography_word_spacing_mobile":{"unit":"em","size":"","sizes":[]},"_title":"","_margin":{"unit":"px","top":"","right":"","bottom":"","left":"","isLinked":true},"_margin_tablet":{"unit":"px","top":"","right":"","bottom":"","left":"","isLinked":true},"_margin_mobile":{"unit":"px","top":"","right":"","bottom":"","left":"","isLinked":true},"_padding":{"unit":"px","top":"","right":"","bottom":"","left":"","isLinked":true},"_padding_tablet":{"unit":"px","top":"","right":"","bottom":"","left":"","isLinked":true},"_padding_mobile":{"unit":"px","top":"","right":"","bottom":"","left":"","isLinked":true},"_element_width":"","_element_width_tablet":"","_element_width_mobile":"","_element_custom_width":{"unit":"%","size":"","sizes":[]},"_element_custom_width_tablet":{"unit":"px","size":"","sizes":[]},"_element_custom_width_mobile":{"unit":"px","size":"","sizes":[]},"_flex_align_self":"","_flex_align_self_tablet":"","_flex_align_self_mobile":"","_flex_order":"","_flex_order_tablet":"","_flex_order_mobile":"","_flex_order_custom":"","_flex_order_custom_tablet":"","_flex_order_custom_mobile":"","_flex_size":"","_flex_size_tablet":"","_flex_size_mobile":"","_flex_grow":1,"_flex_grow_tablet":"","_flex_grow_mobile":"","_flex_shrink":1,"_flex_shrink_tablet":"","_flex_shrink_mobile":"","_element_vertical_align":"","_element_vertical_align_tablet":"","_element_vertical_align_mobile":"","_position":"","_offset_orientation_h":"start","_offset_x":{"unit":"px","size":0,"sizes":[]},"_offset_x_tablet":{"unit":"px","size":"","sizes":[]},"_offset_x_mobile":{"unit":"px","size":"","sizes":[]},"_offset_x_end":{"unit":"px","size":0,"sizes":[]},"_offset_x_end_tablet":{"unit":"px","size":"","sizes":[]},"_offset_x_end_mobile":{"unit":"px","size":"","sizes":[]},"_offset_orientation_v":"start","_offset_y":{"unit":"px","size":0,"sizes":[]},"_offset_y_tablet":{"unit":"px","size":"","sizes":[]},"_offset_y_mobile":{"unit":"px","size":"","sizes":[]},"_offset_y_end":{"unit":"px","size":0,"sizes":[]},"_offset_y_end_tablet":{"unit":"px","size":"","sizes":[]},"_offset_y_end_mobile":{"unit":"px","size":"","sizes":[]},"_z_index":"","_z_index_tablet":"","_z_index_mobile":"","_element_id":"","_css_classes":"","e_display_conditions":"","motion_fx_motion_fx_scrolling":"","motion_fx_translateY_effect":"","motion_fx_translateY_direction":"","motion_fx_translateY_speed":{"unit":"px","size":4,"sizes":[]},"motion_fx_translateY_affectedRange":{"unit":"%","size":"","sizes":{"start":0,"end":100}},"motion_fx_translateX_effect":"","motion_fx_translateX_direction":"","motion_fx_translateX_speed":{"unit":"px","size":4,"sizes":[]},"motion_fx_translateX_affectedRange":{"unit":"%","size":"","sizes":{"start":0,"end":100}},"motion_fx_opacity_effect":"","motion_fx_opacity_direction":"out-in","motion_fx_opacity_level":{"unit":"px","size":10,"sizes":[]},"motion_fx_opacity_range":{"unit":"%","size":"","sizes":{"start":20,"end":80}},"motion_fx_blur_effect":"","motion_fx_blur_direction":"out-in","motion_fx_blur_level":{"unit":"px","size":7,"sizes":[]},"motion_fx_blur_range":{"unit":"%","size":"","sizes":{"start":20,"end":80}},"motion_fx_rotateZ_effect":"","motion_fx_rotateZ_direction":"","motion_fx_rotateZ_speed":{"unit":"px","size":1,"sizes":[]},"motion_fx_rotateZ_affectedRange":{"unit":"%","size":"","sizes":{"start":0,"end":100}},"motion_fx_scale_effect":"","motion_fx_scale_direction":"out-in","motion_fx_scale_speed":{"unit":"px","size":4,"sizes":[]},"motion_fx_scale_range":{"unit":"%","size":"","sizes":{"start":20,"end":80}},"motion_fx_transform_origin_x":"center","motion_fx_transform_origin_y":"center","motion_fx_devices":["desktop","tablet","mobile"],"motion_fx_range":"","motion_fx_motion_fx_mouse":"","motion_fx_mouseTrack_effect":"","motion_fx_mouseTrack_direction":"","motion_fx_mouseTrack_speed":{"unit":"px","size":1,"sizes":[]},"motion_fx_tilt_effect":"","motion_fx_tilt_direction":"","motion_fx_tilt_speed":{"unit":"px","size":4,"sizes":[]},"sticky":"","sticky_on":["desktop","tablet","mobile"],"sticky_offset":0,"sticky_offset_tablet":"","sticky_offset_mobile":"","sticky_effects_offset":0,"sticky_effects_offset_tablet":"","sticky_effects_offset_mobile":"","sticky_parent":"","_animation":"","_animation_tablet":"","_animation_mobile":"","animation_duration":"","_animation_delay":"","_transform_rotate_popover":"","_transform_rotateZ_effect":{"unit":"px","size":"","sizes":[]},"_transform_rotateZ_effect_tablet":{"unit":"deg","size":"","sizes":[]},"_transform_rotateZ_effect_mobile":{"unit":"deg","size":"","sizes":[]},"_transform_rotate_3d":"","_transform_rotateX_effect":{"unit":"px","size":"","sizes":[]},"_transform_rotateX_effect_tablet":{"unit":"deg","size":"","sizes":[]},"_transform_rotateX_effect_mobile":{"unit":"deg","size":"","sizes":[]},"_transform_rotateY_effect":{"unit":"px","size":"","sizes":[]},"_transform_rotateY_effect_tablet":{"unit":"deg","size":"","sizes":[]},"_transform_rotateY_effect_mobile":{"unit":"deg","size":"","sizes":[]},"_transform_perspective_effect":{"unit":"px","size":"","sizes":[]},"_transform_perspective_effect_tablet":{"unit":"px","size":"","sizes":[]},"_transform_perspective_effect_mobile":{"unit":"px","size":"","sizes":[]},"_transform_translate_popover":"","_transform_translateX_effect":{"unit":"px","size":"","sizes":[]},"_transform_translateX_effect_tablet":{"unit":"px","size":"","sizes":[]},"_transform_translateX_effect_mobile":{"unit":"px","size":"","sizes":[]},"_transform_translateY_effect":{"unit":"px","size":"","sizes":[]},"_transform_translateY_effect_tablet":{"unit":"px","size":"","sizes":[]},"_transform_translateY_effect_mobile":{"unit":"px","size":"","sizes":[]},"_transform_scale_popover":"","_transform_keep_proportions":"yes","_transform_scale_effect":{"unit":"px","size":"","sizes":[]},"_transform_scale_effect_tablet":{"unit":"px","size":"","sizes":[]},"_transform_scale_effect_mobile":{"unit":"px","size":"","sizes":[]},"_transform_scaleX_effect":{"unit":"px","size":"","sizes":[]},"_transform_scaleX_effect_tablet":{"unit":"px","size":"","sizes":[]},"_transform_scaleX_effect_mobile":{"unit":"px","size":"","sizes":[]},"_transform_scaleY_effect":{"unit":"px","size":"","sizes":[]},"_transform_scaleY_effect_tablet":{"unit":"px","size":"","sizes":[]},"_transform_scaleY_effect_mobile":{"unit":"px","size":"","sizes":[]},"_transform_skew_popover":"","_transform_skewX_effect":{"unit":"px","size":"","sizes":[]},"_transform_skewX_effect_tablet":{"unit":"deg","size":"","sizes":[]},"_transform_skewX_effect_mobile":{"unit":"deg","size":"","sizes":[]},"_transform_skewY_effect":{"unit":"px","size":"","sizes":[]},"_transform_skewY_effect_tablet":{"unit":"deg","size":"","sizes":[]},"_transform_skewY_effect_mobile":{"unit":"deg","size":"","sizes":[]},"_transform_flipX_effect":"","_transform_flipY_effect":"","_transform_rotate_popover_hover":"","_transform_rotateZ_effect_hover":{"unit":"px","size":"","sizes":[]},"_transform_rotateZ_effect_hover_tablet":{"unit":"deg","size":"","sizes":[]},"_transform_rotateZ_effect_hover_mobile":{"unit":"deg","size":"","sizes":[]},"_transform_rotate_3d_hover":"","_transform_rotateX_effect_hover":{"unit":"px","size":"","sizes":[]},"_transform_rotateX_effect_hover_tablet":{"unit":"deg","size":"","sizes":[]},"_transform_rotateX_effect_hover_mobile":{"unit":"deg","size":"","sizes":[]},"_transform_rotateY_effect_hover":{"unit":"px","size":"","sizes":[]},"_transform_rotateY_effect_hover_tablet":{"unit":"deg","size":"","sizes":[]},"_transform_rotateY_effect_hover_mobile":{"unit":"deg","size":"","sizes":[]},"_transform_perspective_effect_hover":{"unit":"px","size":"","sizes":[]},"_transform_perspective_effect_hover_tablet":{"unit":"px","size":"","sizes":[]},"_transform_perspective_effect_hover_mobile":{"unit":"px","size":"","sizes":[]},"_transform_translate_popover_hover":"","_transform_translateX_effect_hover":{"unit":"px","size":"","sizes":[]},"_transform_translateX_effect_hover_tablet":{"unit":"px","size":"","sizes":[]},"_transform_translateX_effect_hover_mobile":{"unit":"px","size":"","sizes":[]},"_transform_translateY_effect_hover":{"unit":"px","size":"","sizes":[]},"_transform_translateY_effect_hover_tablet":{"unit":"px","size":"","sizes":[]},"_transform_translateY_effect_hover_mobile":{"unit":"px","size":"","sizes":[]},"_transform_scale_popover_hover":"","_transform_keep_proportions_hover":"yes","_transform_scale_effect_hover":{"unit":"px","size":"","sizes":[]},"_transform_scale_effect_hover_tablet":{"unit":"px","size":"","sizes":[]},"_transform_scale_effect_hover_mobile":{"unit":"px","size":"","sizes":[]},"_transform_scaleX_effect_hover":{"unit":"px","size":"","sizes":[]},"_transform_scaleX_effect_hover_tablet":{"unit":"px","size":"","sizes":[]},"_transform_scaleX_effect_hover_mobile":{"unit":"px","size":"","sizes":[]},"_transform_scaleY_effect_hover":{"unit":"px","size":"","sizes":[]},"_transform_scaleY_effect_hover_tablet":{"unit":"px","size":"","sizes":[]},"_transform_scaleY_effect_hover_mobile":{"unit":"px","size":"","sizes":[]},"_transform_skew_popover_hover":"","_transform_skewX_effect_hover":{"unit":"px","size":"","sizes":[]},"_transform_skewX_effect_hover_tablet":{"unit":"deg","size":"","sizes":[]},"_transform_skewX_effect_hover_mobile":{"unit":"deg","size":"","sizes":[]},"_transform_skewY_effect_hover":{"unit":"px","size":"","sizes":[]},"_transform_skewY_effect_hover_tablet":{"unit":"deg","size":"","sizes":[]},"_transform_skewY_effect_hover_mobile":{"unit":"deg","size":"","sizes":[]},"_transform_flipX_effect_hover":"","_transform_flipY_effect_hover":"","_transform_transition_hover":{"unit":"px","size":"","sizes":[]},"motion_fx_transform_x_anchor_point":"","motion_fx_transform_x_anchor_point_tablet":"","motion_fx_transform_x_anchor_point_mobile":"","motion_fx_transform_y_anchor_point":"","motion_fx_transform_y_anchor_point_tablet":"","motion_fx_transform_y_anchor_point_mobile":"","_background_background":"","_background_color":"","_background_color_stop":{"unit":"%","size":0,"sizes":[]},"_background_color_stop_tablet":{"unit":"%"},"_background_color_stop_mobile":{"unit":"%"},"_background_color_b":"#f2295b","_background_color_b_stop":{"unit":"%","size":100,"sizes":[]},"_background_color_b_stop_tablet":{"unit":"%"},"_background_color_b_stop_mobile":{"unit":"%"},"_background_gradient_type":"linear","_background_gradient_angle":{"unit":"deg","size":180,"sizes":[]},"_background_gradient_angle_tablet":{"unit":"deg"},"_background_gradient_angle_mobile":{"unit":"deg"},"_background_gradient_position":"center center","_background_gradient_position_tablet":"","_background_gradient_position_mobile":"","_background_image":{"url":"","id":"","size":""},"_background_image_tablet":{"url":"","id":"","size":""},"_background_image_mobile":{"url":"","id":"","size":""},"_background_position":"","_background_position_tablet":"","_background_position_mobile":"","_background_xpos":{"unit":"px","size":0,"sizes":[]},"_background_xpos_tablet":{"unit":"px","size":0,"sizes":[]},"_background_xpos_mobile":{"unit":"px","size":0,"sizes":[]},"_background_ypos":{"unit":"px","size":0,"sizes":[]},"_background_ypos_tablet":{"unit":"px","size":0,"sizes":[]},"_background_ypos_mobile":{"unit":"px","size":0,"sizes":[]},"_background_attachment":"","_background_repeat":"","_background_repeat_tablet":"","_background_repeat_mobile":"","_background_size":"","_background_size_tablet":"","_background_size_mobile":"","_background_bg_width":{"unit":"%","size":100,"sizes":[]},"_background_bg_width_tablet":{"unit":"px","size":"","sizes":[]},"_background_bg_width_mobile":{"unit":"px","size":"","sizes":[]},"_background_video_link":"","_background_video_start":"","_background_video_end":"","_background_play_once":"","_background_play_on_mobile":"","_background_privacy_mode":"","_background_video_fallback":{"url":"","id":"","size":""},"_background_slideshow_gallery":[],"_background_slideshow_loop":"yes","_background_slideshow_slide_duration":5000,"_background_slideshow_slide_transition":"fade","_background_slideshow_transition_duration":500,"_background_slideshow_background_size":"","_background_slideshow_background_size_tablet":"","_background_slideshow_background_size_mobile":"","_background_slideshow_background_position":"","_background_slideshow_background_position_tablet":"","_background_slideshow_background_position_mobile":"","_background_slideshow_lazyload":"","_background_slideshow_ken_burns":"","_background_slideshow_ken_burns_zoom_direction":"in","_background_hover_background":"","_background_hover_color":"","_background_hover_color_stop":{"unit":"%","size":0,"sizes":[]},"_background_hover_color_stop_tablet":{"unit":"%"},"_background_hover_color_stop_mobile":{"unit":"%"},"_background_hover_color_b":"#f2295b","_background_hover_color_b_stop":{"unit":"%","size":100,"sizes":[]},"_background_hover_color_b_stop_tablet":{"unit":"%"},"_background_hover_color_b_stop_mobile":{"unit":"%"},"_background_hover_gradient_type":"linear","_background_hover_gradient_angle":{"unit":"deg","size":180,"sizes":[]},"_background_hover_gradient_angle_tablet":{"unit":"deg"},"_background_hover_gradient_angle_mobile":{"unit":"deg"},"_background_hover_gradient_position":"center center","_background_hover_gradient_position_tablet":"","_background_hover_gradient_position_mobile":"","_background_hover_image":{"url":"","id":"","size":""},"_background_hover_image_tablet":{"url":"","id":"","size":""},"_background_hover_image_mobile":{"url":"","id":"","size":""},"_background_hover_position":"","_background_hover_position_tablet":"","_background_hover_position_mobile":"","_background_hover_xpos":{"unit":"px","size":0,"sizes":[]},"_background_hover_xpos_tablet":{"unit":"px","size":0,"sizes":[]},"_background_hover_xpos_mobile":{"unit":"px","size":0,"sizes":[]},"_background_hover_ypos":{"unit":"px","size":0,"sizes":[]},"_background_hover_ypos_tablet":{"unit":"px","size":0,"sizes":[]},"_background_hover_ypos_mobile":{"unit":"px","size":0,"sizes":[]},"_background_hover_attachment":"","_background_hover_repeat":"","_background_hover_repeat_tablet":"","_background_hover_repeat_mobile":"","_background_hover_size":"","_background_hover_size_tablet":"","_background_hover_size_mobile":"","_background_hover_bg_width":{"unit":"%","size":100,"sizes":[]},"_background_hover_bg_width_tablet":{"unit":"px","size":"","sizes":[]},"_background_hover_bg_width_mobile":{"unit":"px","size":"","sizes":[]},"_background_hover_video_link":"","_background_hover_video_start":"","_background_hover_video_end":"","_background_hover_play_once":"","_background_hover_play_on_mobile":"","_background_hover_privacy_mode":"","_background_hover_video_fallback":{"url":"","id":"","size":""},"_background_hover_slideshow_gallery":[],"_background_hover_slideshow_loop":"yes","_background_hover_slideshow_slide_duration":5000,"_background_hover_slideshow_slide_transition":"fade","_background_hover_slideshow_transition_duration":500,"_background_hover_slideshow_background_size":"","_background_hover_slideshow_background_size_tablet":"","_background_hover_slideshow_background_size_mobile":"","_background_hover_slideshow_background_position":"","_background_hover_slideshow_background_position_tablet":"","_background_hover_slideshow_background_position_mobile":"","_background_hover_slideshow_lazyload":"","_background_hover_slideshow_ken_burns":"","_background_hover_slideshow_ken_burns_zoom_direction":"in","_background_hover_transition":{"unit":"px","size":"","sizes":[]},"_border_border":"","_border_width":{"unit":"px","top":"","right":"","bottom":"","left":"","isLinked":true},"_border_width_tablet":{"unit":"px","top":"","right":"","bottom":"","left":"","isLinked":true},"_border_width_mobile":{"unit":"px","top":"","right":"","bottom":"","left":"","isLinked":true},"_border_color":"","_border_radius":{"unit":"px","top":"","right":"","bottom":"","left":"","isLinked":true},"_border_radius_tablet":{"unit":"px","top":"","right":"","bottom":"","left":"","isLinked":true},"_border_radius_mobile":{"unit":"px","top":"","right":"","bottom":"","left":"","isLinked":true},"_box_shadow_box_shadow_type":"","_box_shadow_box_shadow":{"horizontal":0,"vertical":0,"blur":10,"spread":0,"color":"rgba(0,0,0,0.5)"},"_box_shadow_box_shadow_position":" ","_border_hover_border":"","_border_hover_width":{"unit":"px","top":"","right":"","bottom":"","left":"","isLinked":true},"_border_hover_width_tablet":{"unit":"px","top":"","right":"","bottom":"","left":"","isLinked":true},"_border_hover_width_mobile":{"unit":"px","top":"","right":"","bottom":"","left":"","isLinked":true},"_border_hover_color":"","_border_radius_hover":{"unit":"px","top":"","right":"","bottom":"","left":"","isLinked":true},"_border_radius_hover_tablet":{"unit":"px","top":"","right":"","bottom":"","left":"","isLinked":true},"_border_radius_hover_mobile":{"unit":"px","top":"","right":"","bottom":"","left":"","isLinked":true},"_box_shadow_hover_box_shadow_type":"","_box_shadow_hover_box_shadow":{"horizontal":0,"vertical":0,"blur":10,"spread":0,"color":"rgba(0,0,0,0.5)"},"_box_shadow_hover_box_shadow_position":" ","_border_hover_transition":{"unit":"px","size":"","sizes":[]},"_mask_switch":"","_mask_shape":"circle","_mask_image":{"url":"","id":"","size":""},"_mask_notice":"","_mask_size":"contain","_mask_size_tablet":"","_mask_size_mobile":"","_mask_size_scale":{"unit":"%","size":100,"sizes":[]},"_mask_size_scale_tablet":{"unit":"px","size":"","sizes":[]},"_mask_size_scale_mobile":{"unit":"px","size":"","sizes":[]},"_mask_position":"center center","_mask_position_tablet":"","_mask_position_mobile":"","_mask_position_x":{"unit":"%","size":0,"sizes":[]},"_mask_position_x_tablet":{"unit":"px","size":"","sizes":[]},"_mask_position_x_mobile":{"unit":"px","size":"","sizes":[]},"_mask_position_y":{"unit":"%","size":0,"sizes":[]},"_mask_position_y_tablet":{"unit":"px","size":"","sizes":[]},"_mask_position_y_mobile":{"unit":"px","size":"","sizes":[]},"_mask_repeat":"no-repeat","_mask_repeat_tablet":"","_mask_repeat_mobile":"","hide_desktop":"","hide_tablet":"","hide_mobile":"","_attributes":"","custom_css":""},"defaultEditSettings":{"defaultEditRoute":"content"},"elements":[],"widgetType":"text-editor","editSettings":{"defaultEditRoute":"content","panel":{"activeTab":"content","activeSection":"section_editor"}}}]}](https://help.fitos.io/wp-content/uploads/2024/10/generate-techpack-00001.gif)
Start by selecting the style you want to generate a tech pack for, and FITOS will prompt you to input key information such as fabric details, stitching techniques, trims, and finishes. You can upload sketches, technical drawings, and reference images directly into the tech pack to provide a complete visual guide. Once all the necessary fields are completed, FITOS automatically compiles this data into a comprehensive document that can be easily downloaded, shared, or edited. This ensures that your designs are accurately translated from concept to final production, minimizing errors and streamlining the manufacturing process.
Registration
- Open the URL: https://live.fitos.io
- Click on “Register Now”
- Enter First Name, Last Name, Email id and Password and click Sign Up.
- You will receive an email with a verification code. Enter the Verification code in the next screen.
- On successful verification of the code, you are registered with FitOS.
Login

- After successful verification of code and you will be redirected to the login page. Enter your credentials to login.
- When logging in for the first time, you will see a form to fill the following information:
- Your organization
- Your role in the system – E.g. Designer, Supplier, Creative, etc. It’s a free text to allow the user to define the role they would like to go with. Currently, this is only for User Profile and doesn’t impact permissions.
- Your Timezone
- Your Mobile Number
- Purpose of joining FitOS – This is a drop down consisting of 4 values viz.
Design/Creative Work - Supplier
- Independent Service
- Provider
- Factory/Maker
Note: The thought behind Purpose of Joining is to create an access permissions model. That is, based on the choice made in this dropdown, the system will show or hide certain screens or enable/disable certain workflows. For e.g., a supplier will be able to add/edit materials and also have access to their own supplier information only. Currently though, these permissions are not implemented.
Choosing Purpose as Supplier will display another dropdown called “Supplier of”.
This dropdown will have below options:
- Fabric
- Leather
- Trims
- Packaging
- Others
Choosing Independent Service provider will display another dropdown with the following options:
- Stitching
- Seams
- Artworks
- Patterns
- Others
After selecting the relevant options, and clicking on Next button the user is redirected to the dashboard screen.
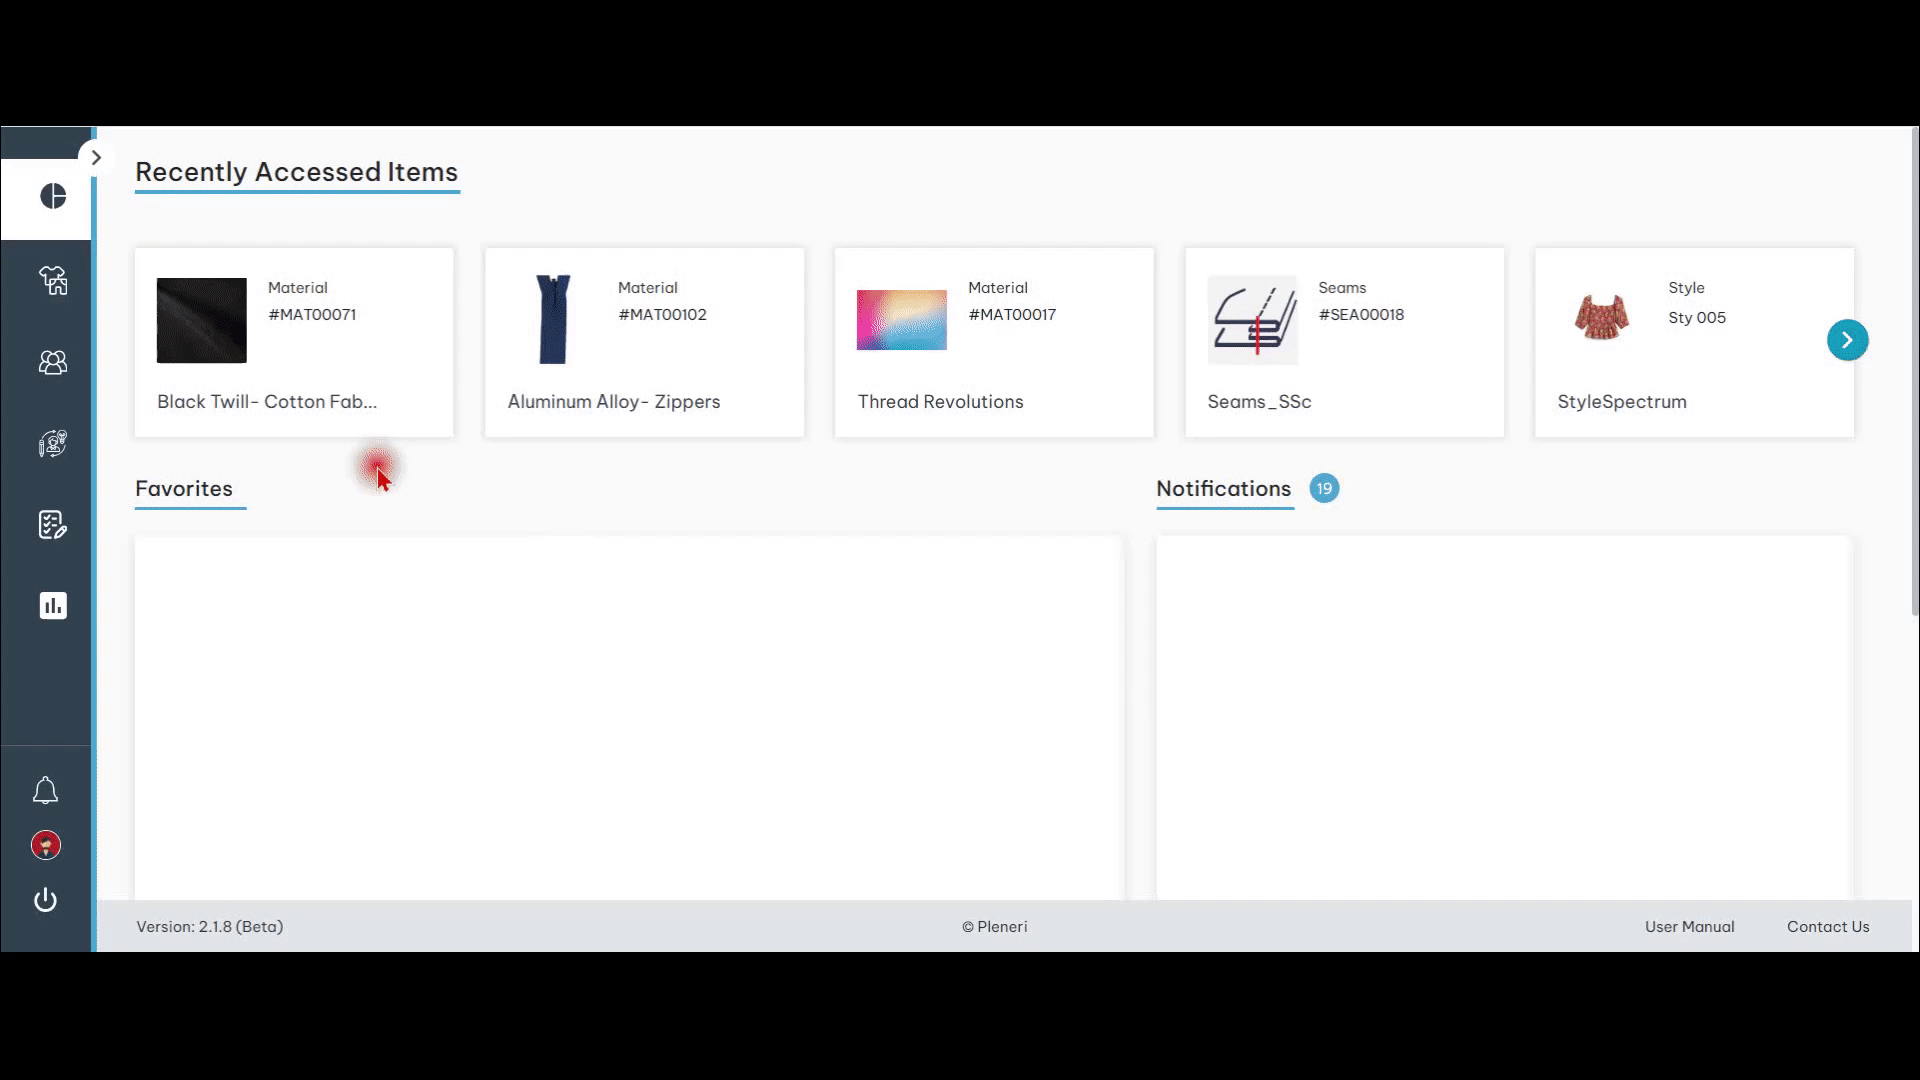
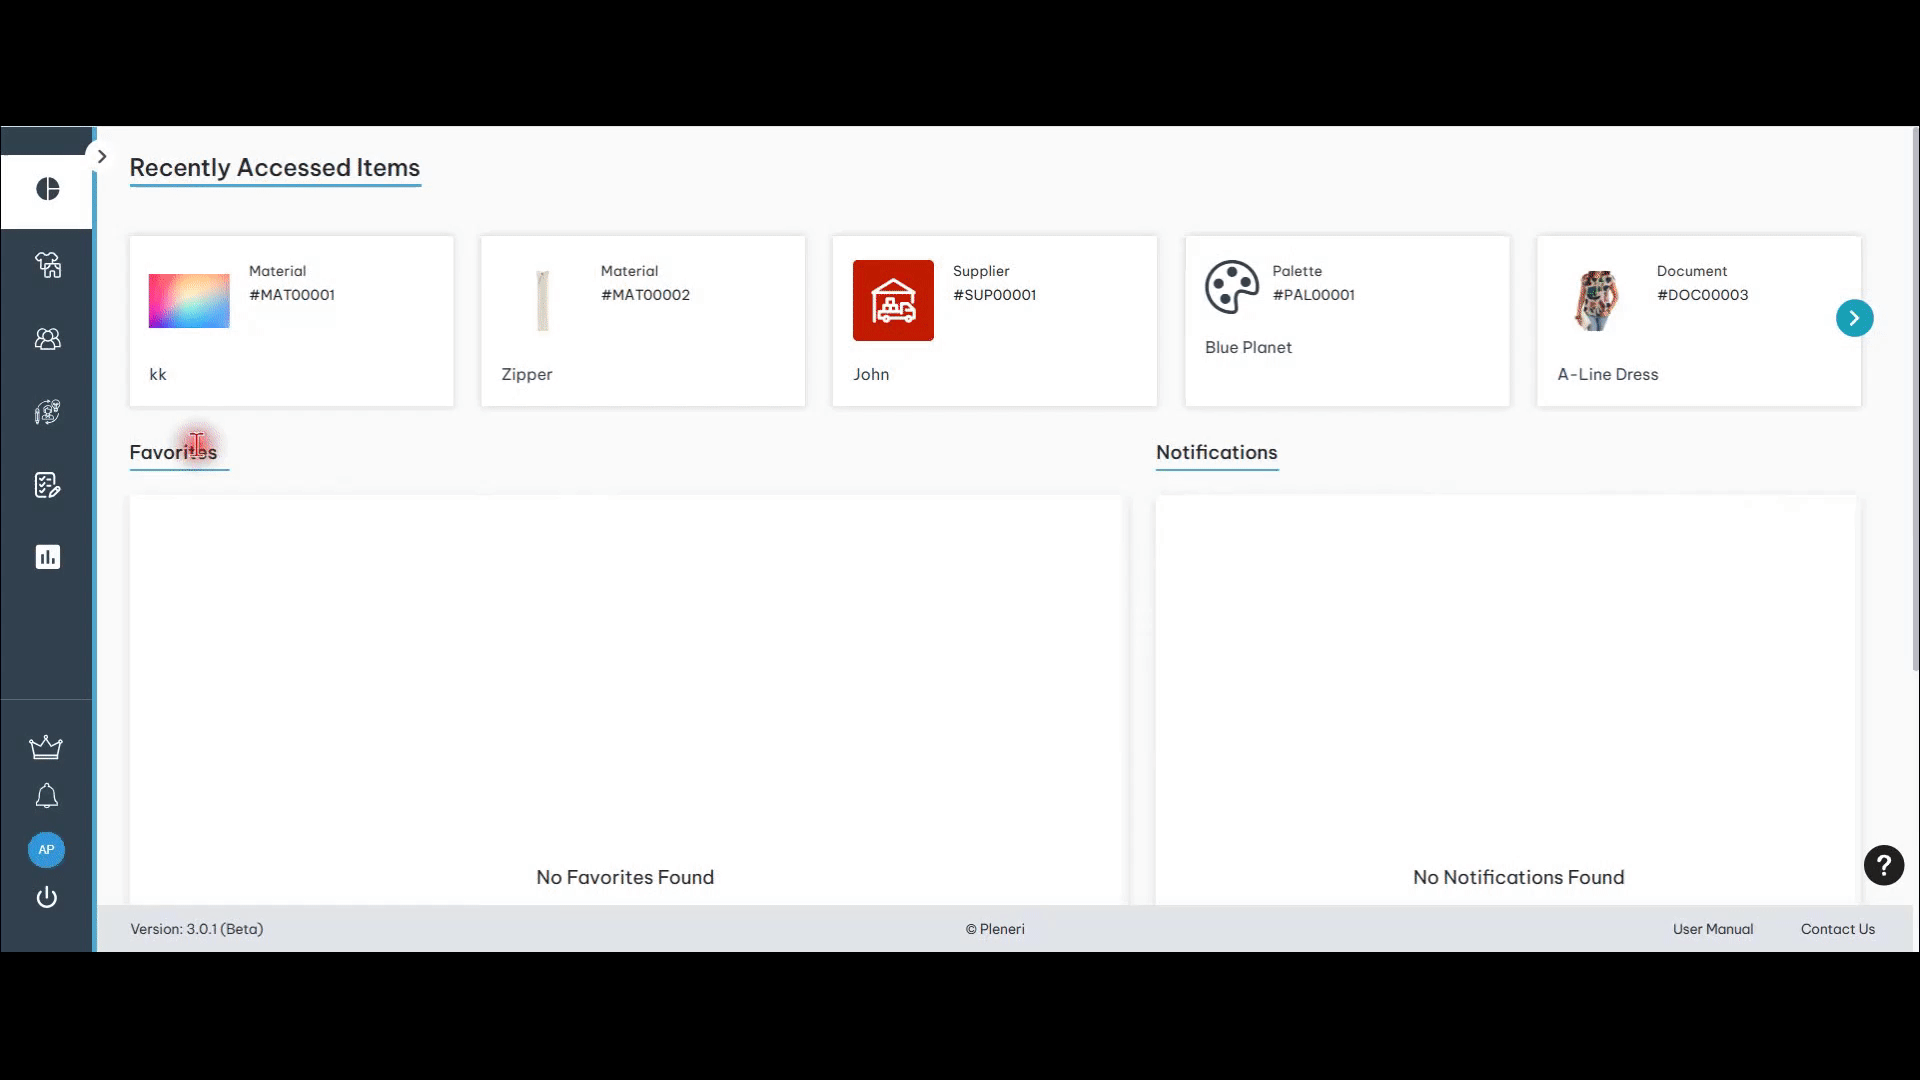
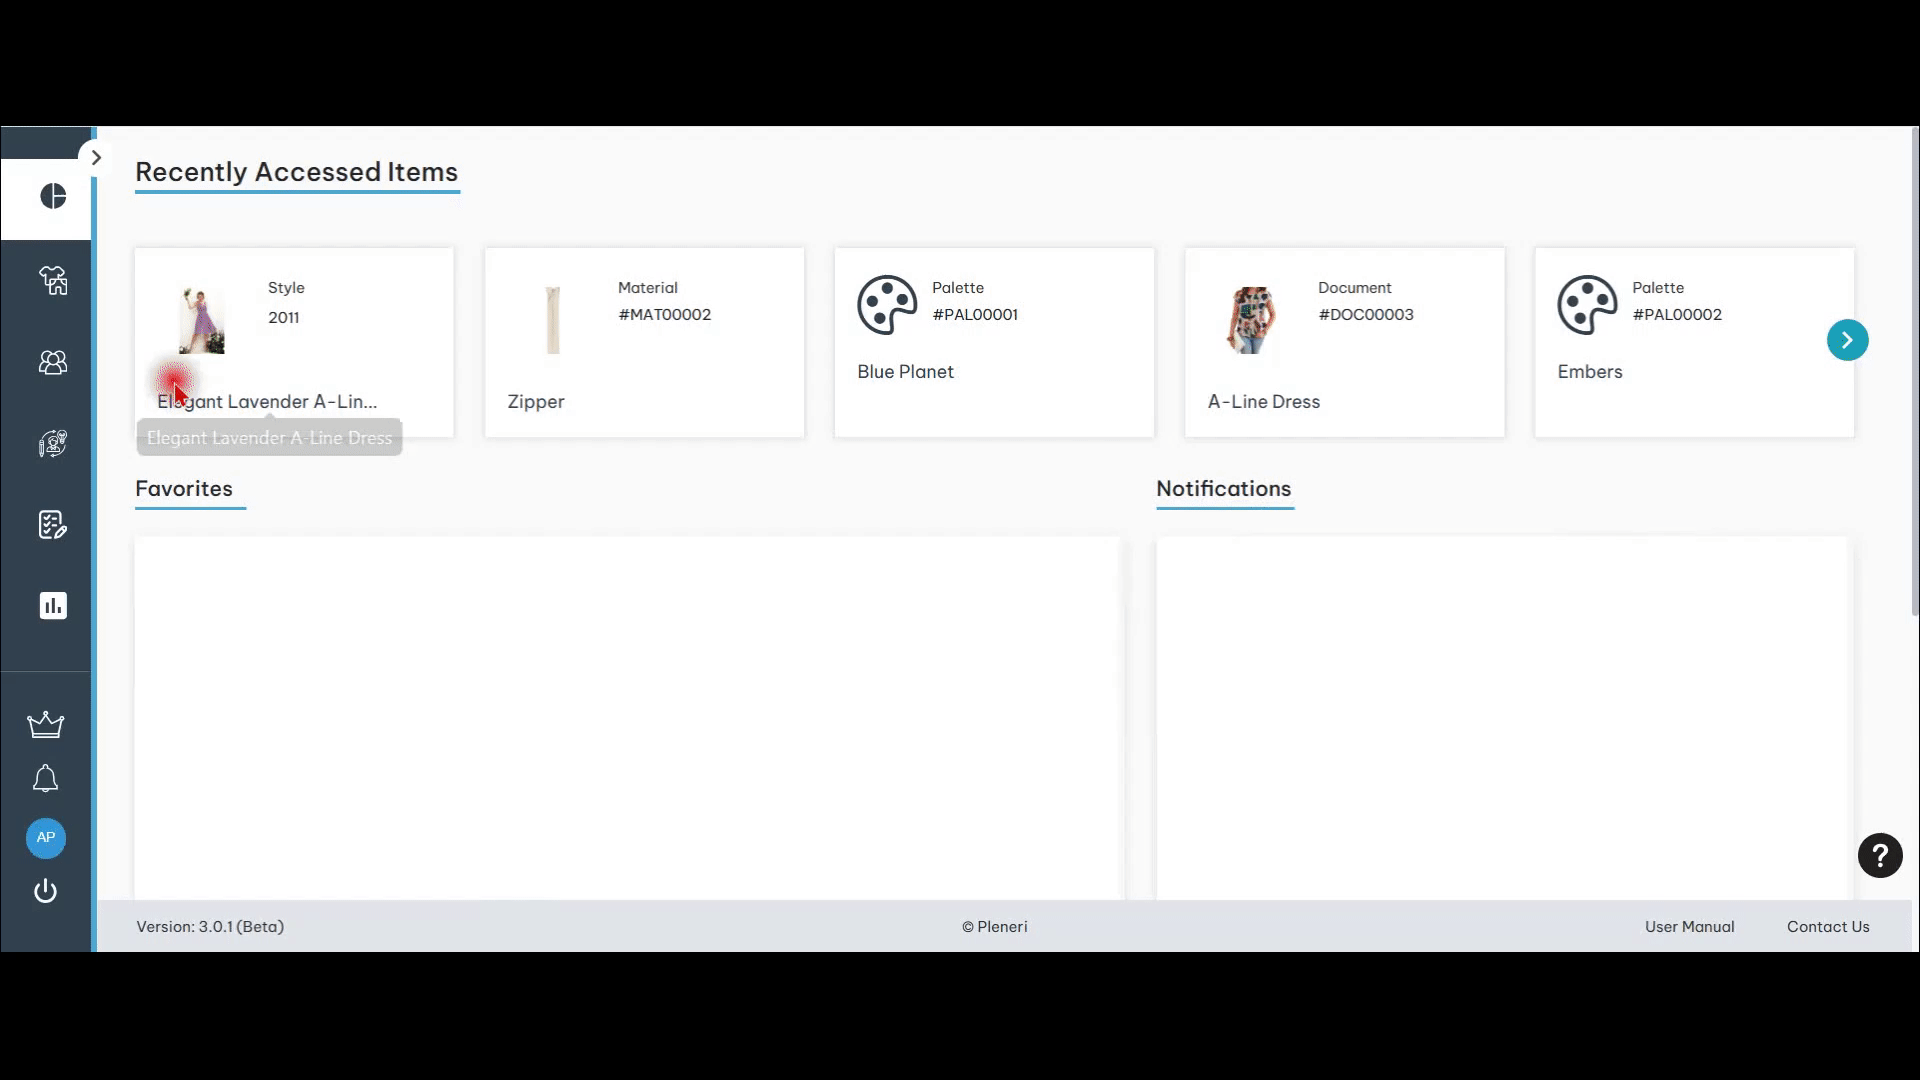
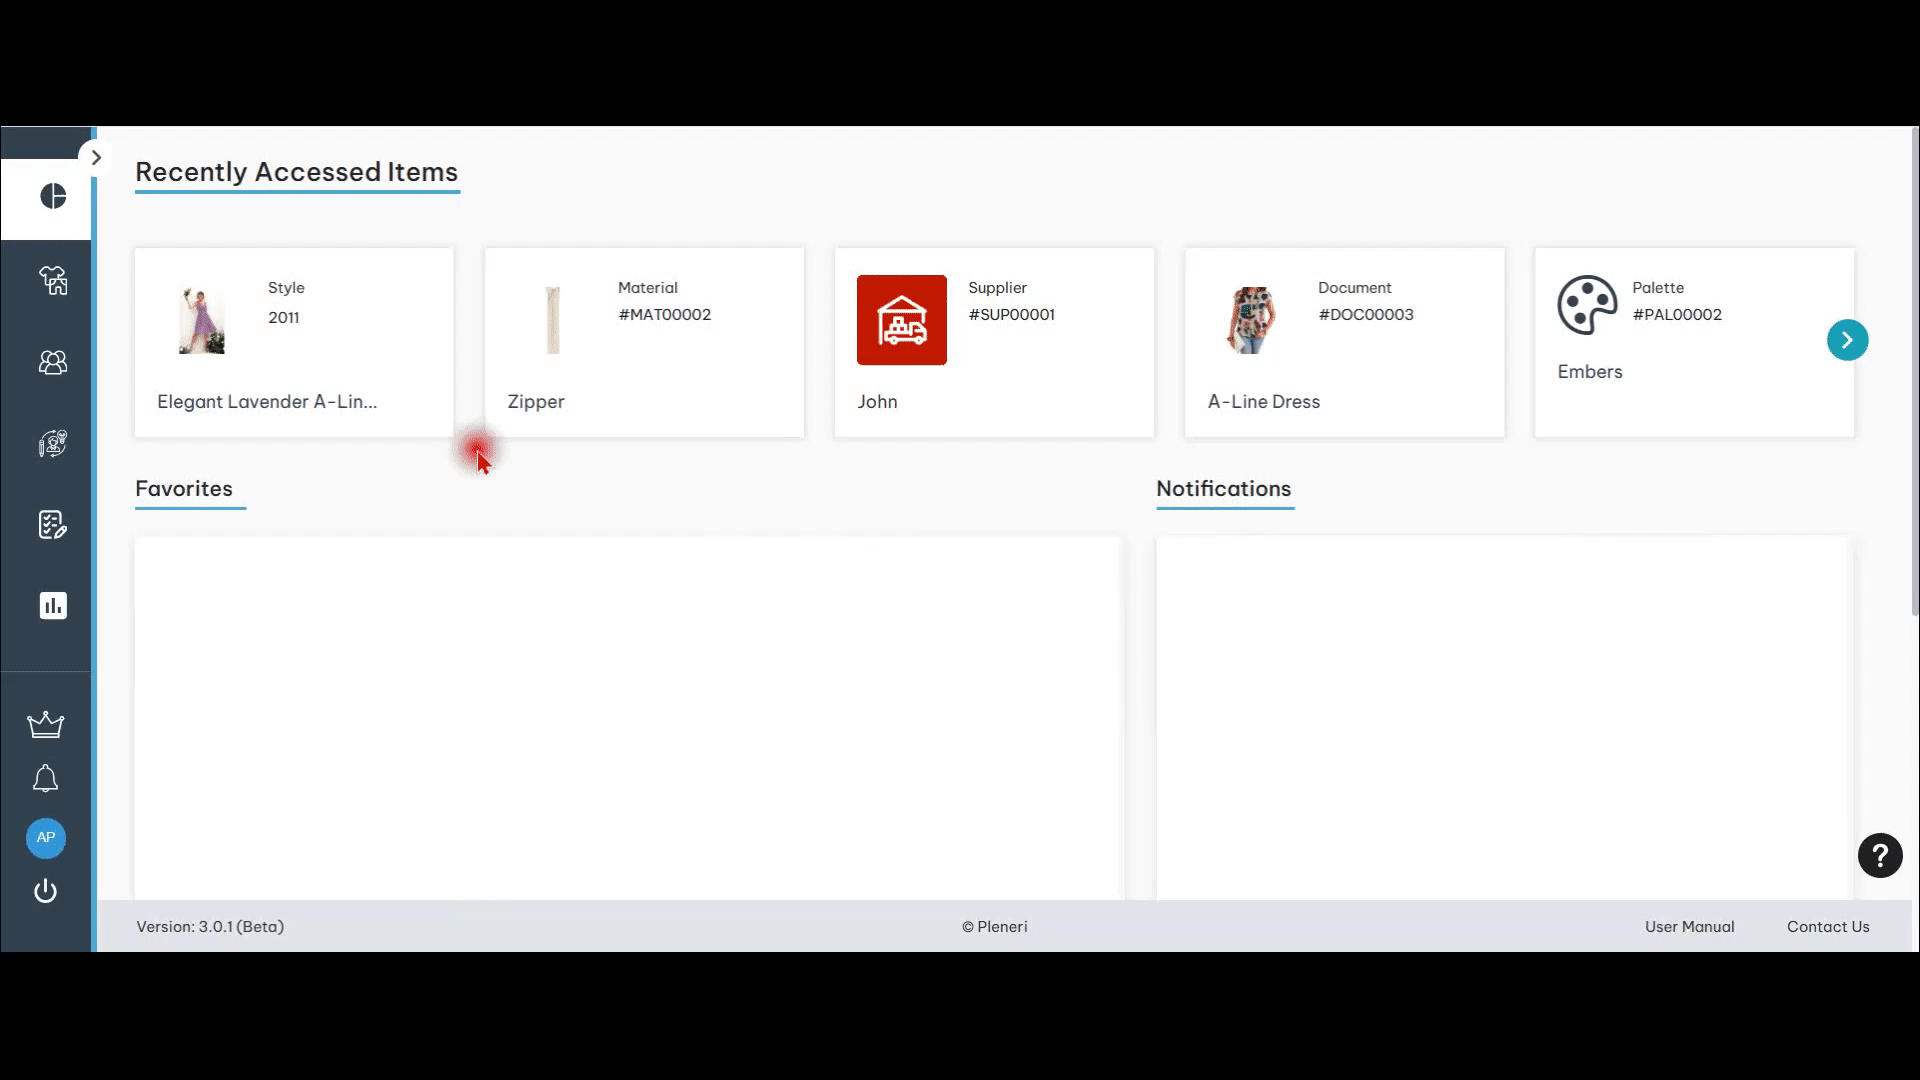
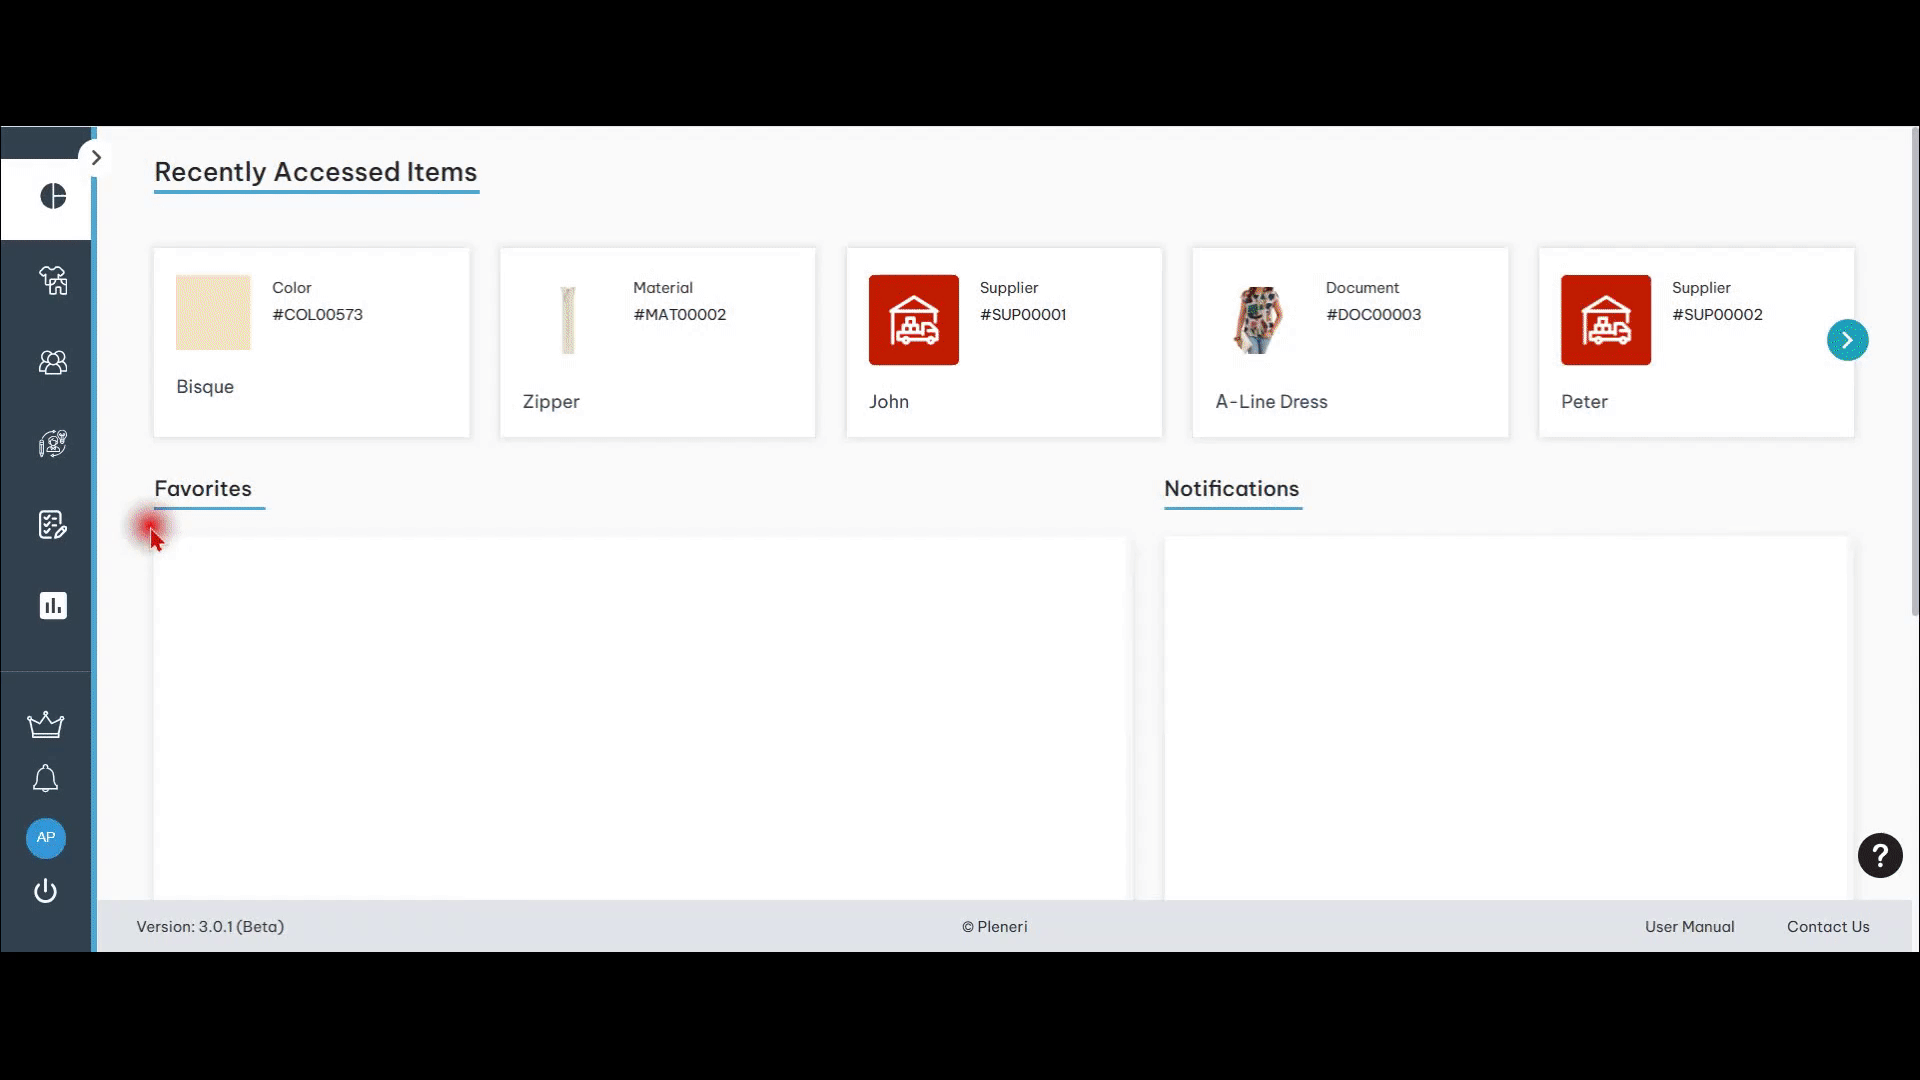
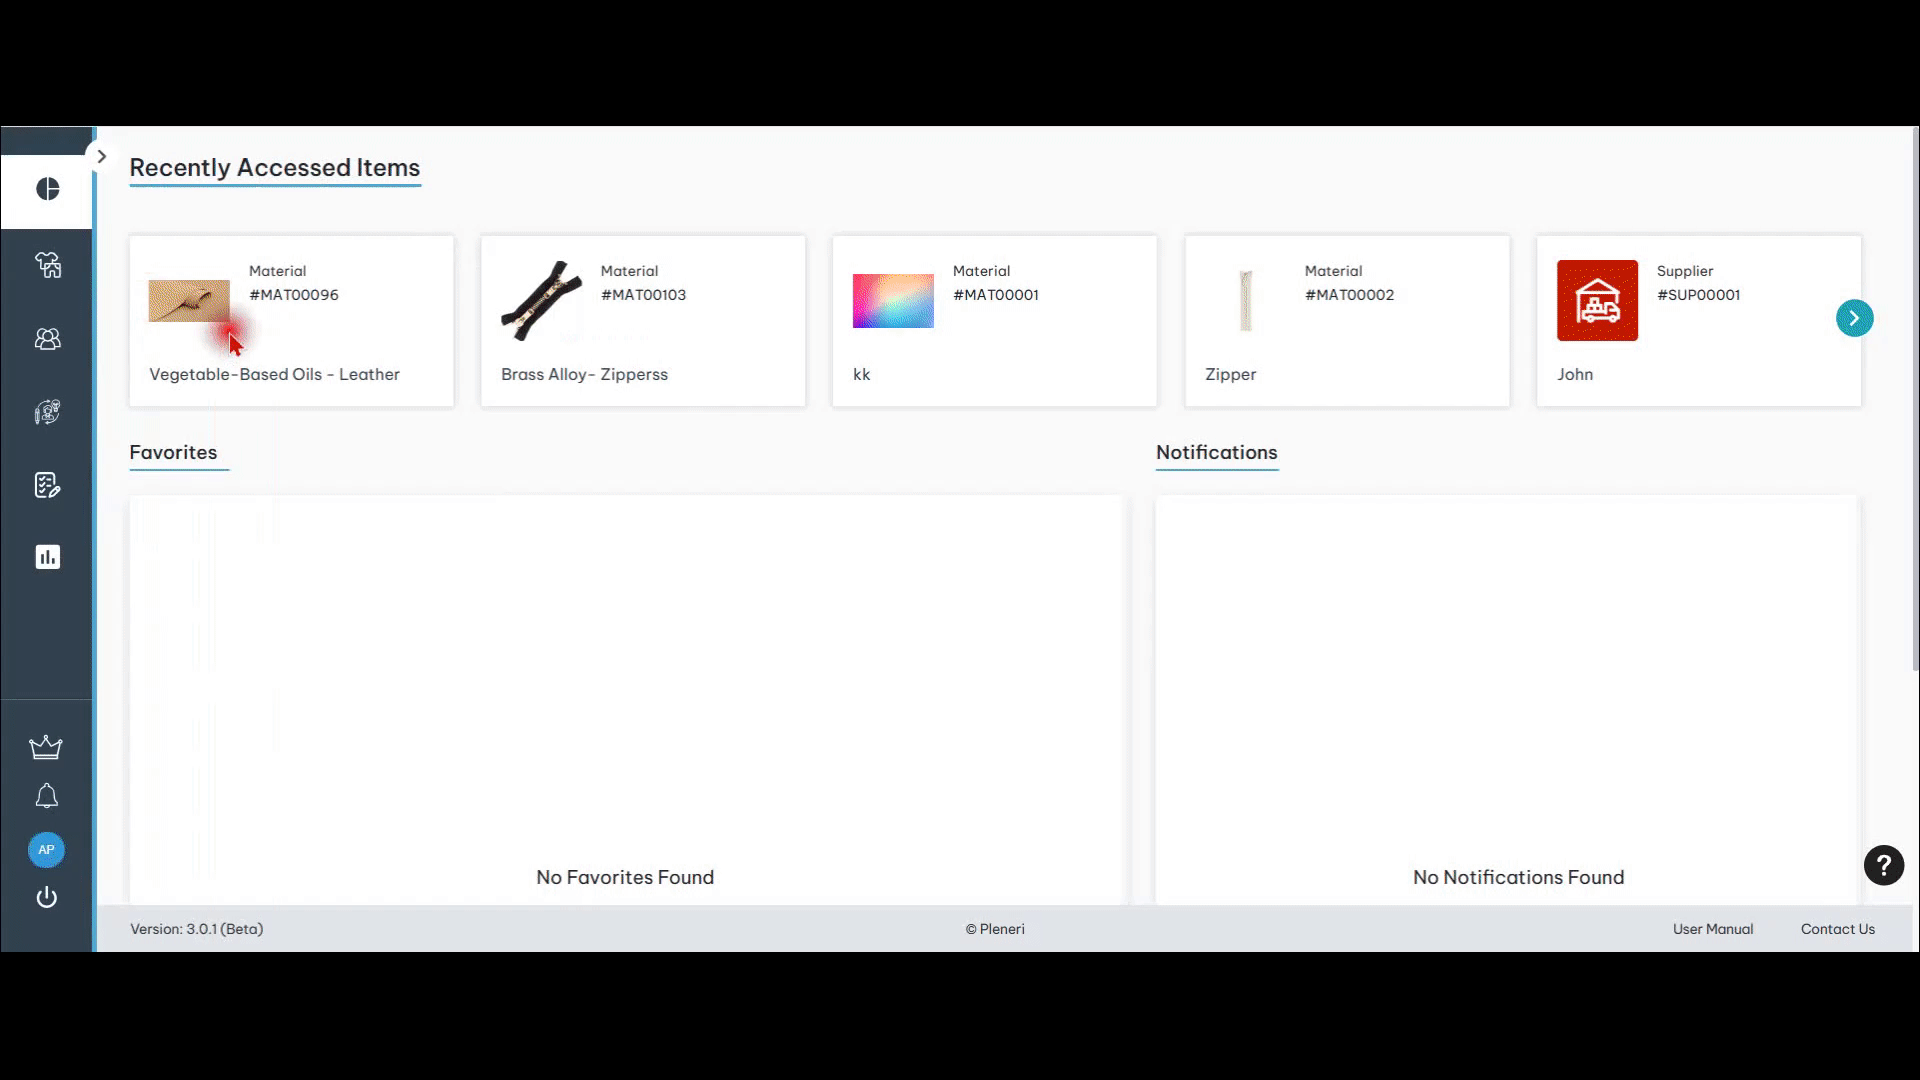
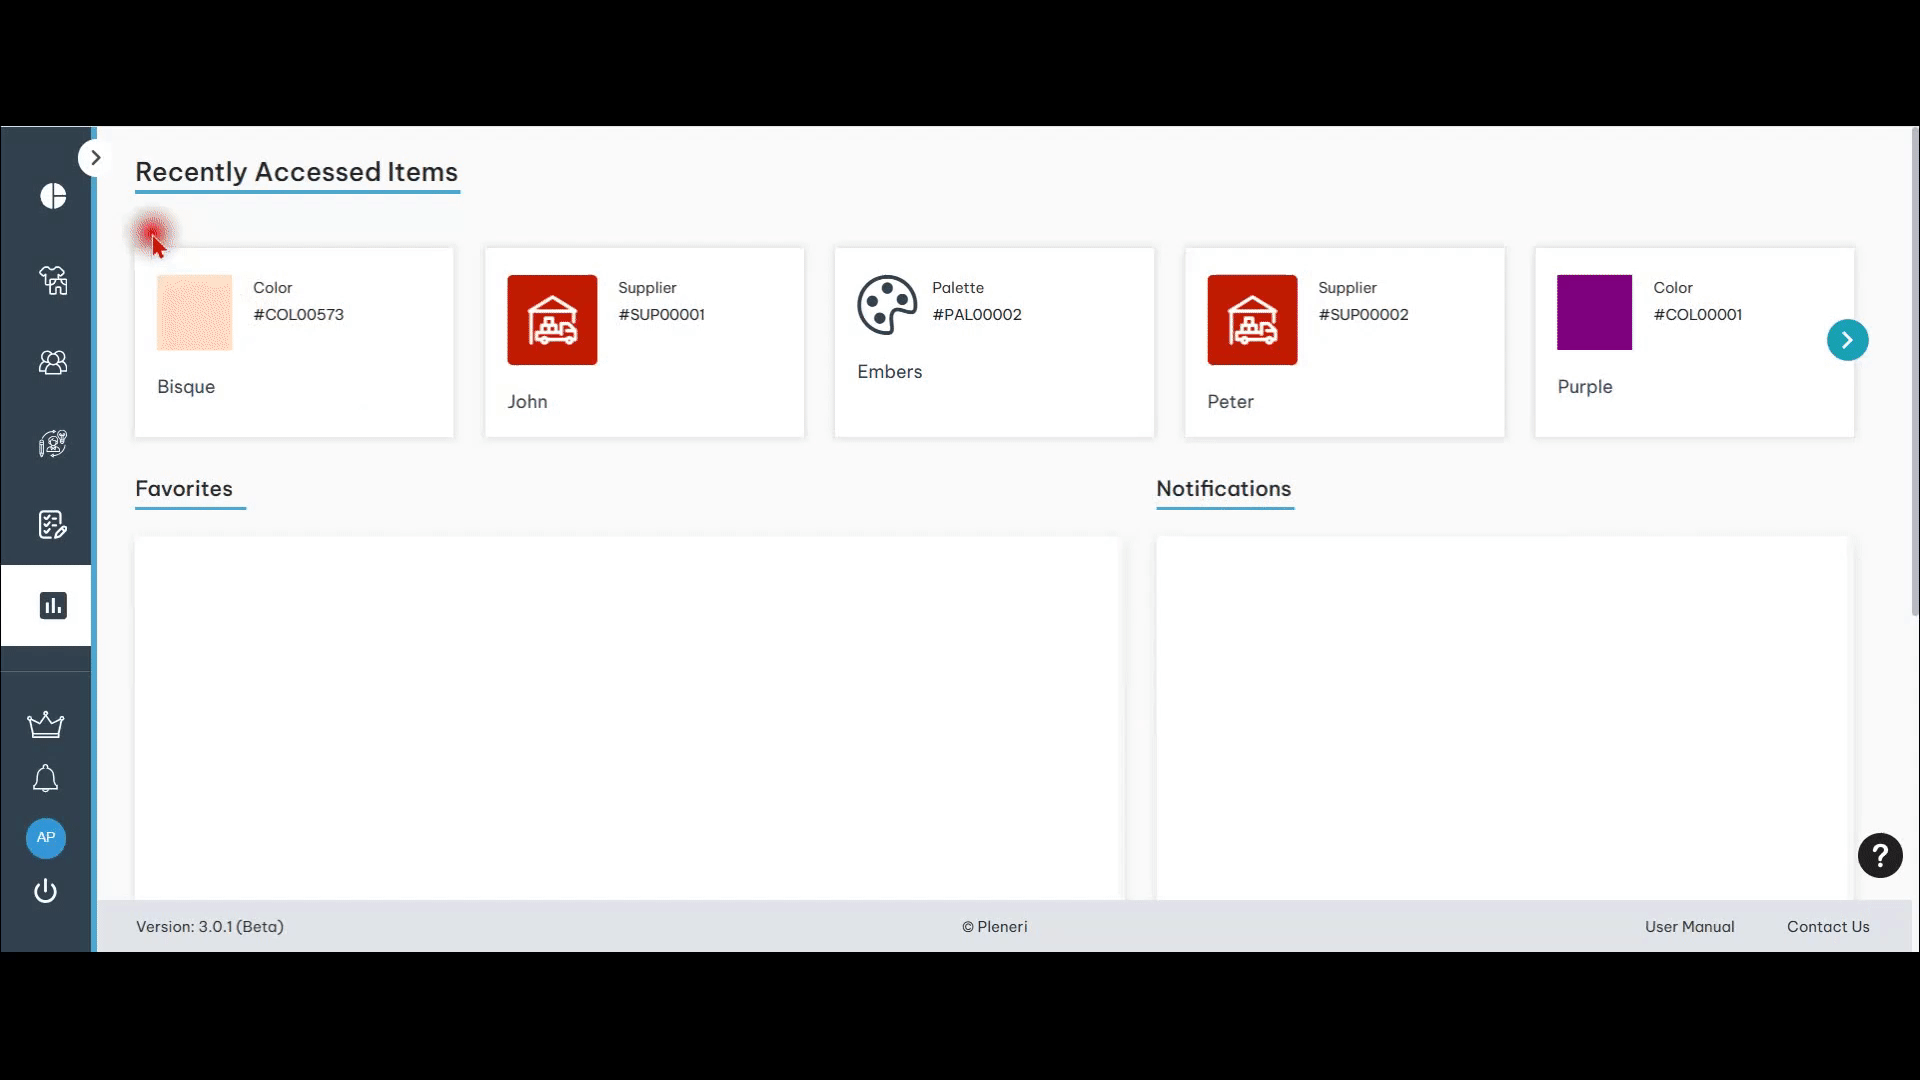
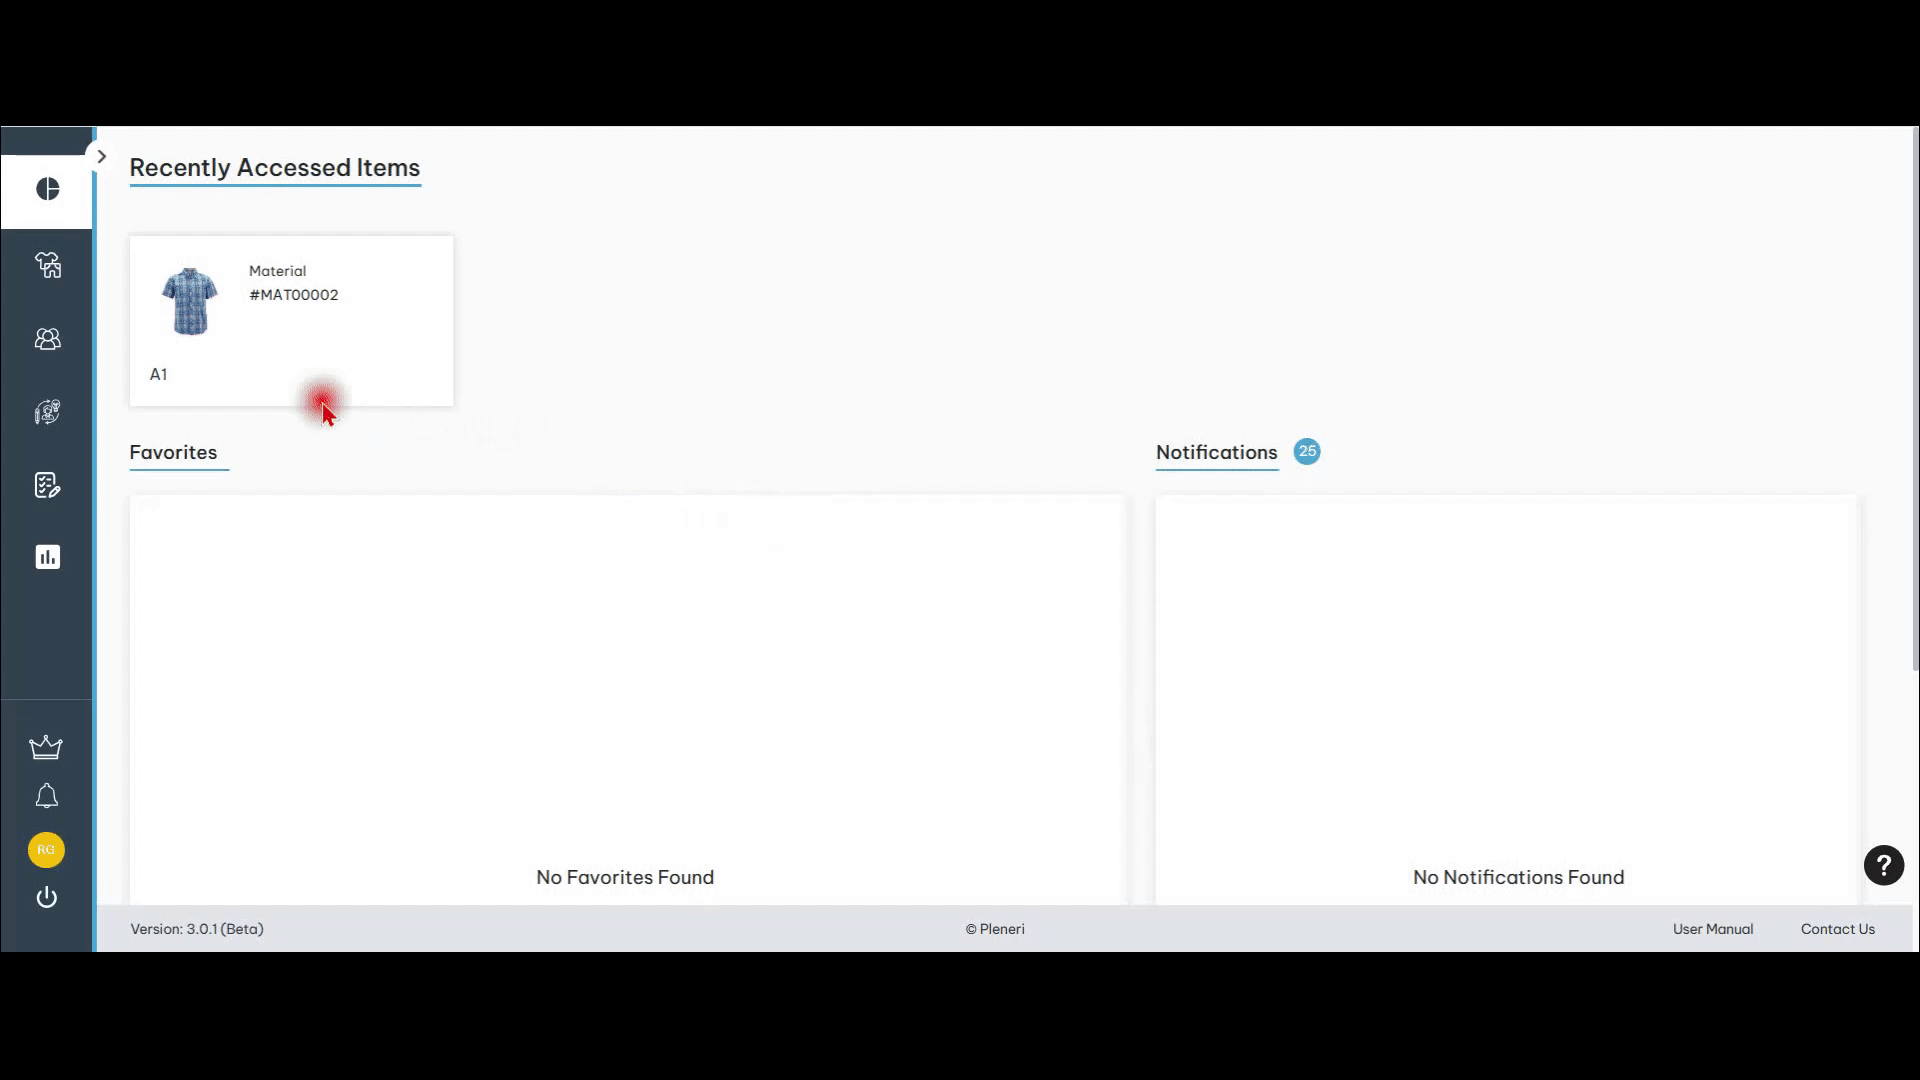
The dashboard serves as the primary interface for users to access and monitor key information at a glance. It consolidates essential data, providing users with a quick overview of their most frequently accessed items, recent activity, and important updates. This centralized view allows for more efficient navigation and task management, enabling users to easily find and interact with relevant content in the system.

The dashboard is a way to quickly access items of interest. For now, the system displays –
Favorites – any style that’s been marked as favorite by the user.
Recently Accessed Items – a horizontal carousel showing the Styles, Materials, etc. that the logged in user has accessed.
Notifications – Notifications the user has received, if any.
Creating a New Style

Style Details BOM Tab Creation
Style Details Colorways Tab Creation

Style Details Measurements Tab Creation

Style Details Pattern Tab Creation

Style Details Construction Tab Creation

Style Details Attachments Tab Creation
Style Details Discussion Chat

In the Manage Styles tab, you will see a button at the top right of the page – + Create New When you click on this +Create New button, you will get 2 options – Create from Scratch and COPY A STYLE.
Create Style from Scratch – If you choose “CREATE FROM SCRATCH”, then you will need to enter required fields as shown below.
The options in the ‘Category’ and ‘Silhouette’ dropdown fields will update dynamically based on the selected ‘Garment Type.
If user select Garment Type as Topwear then
Size Range – Based on the size chart choice, all possible values are shown in Size Range drop down field. Users can select sizes in which the style will need to be designed for. It’s dropdown shown below
Sample Size – Based on the selected values in Size Range, user can select the Sample Size for Points of Measure reference.
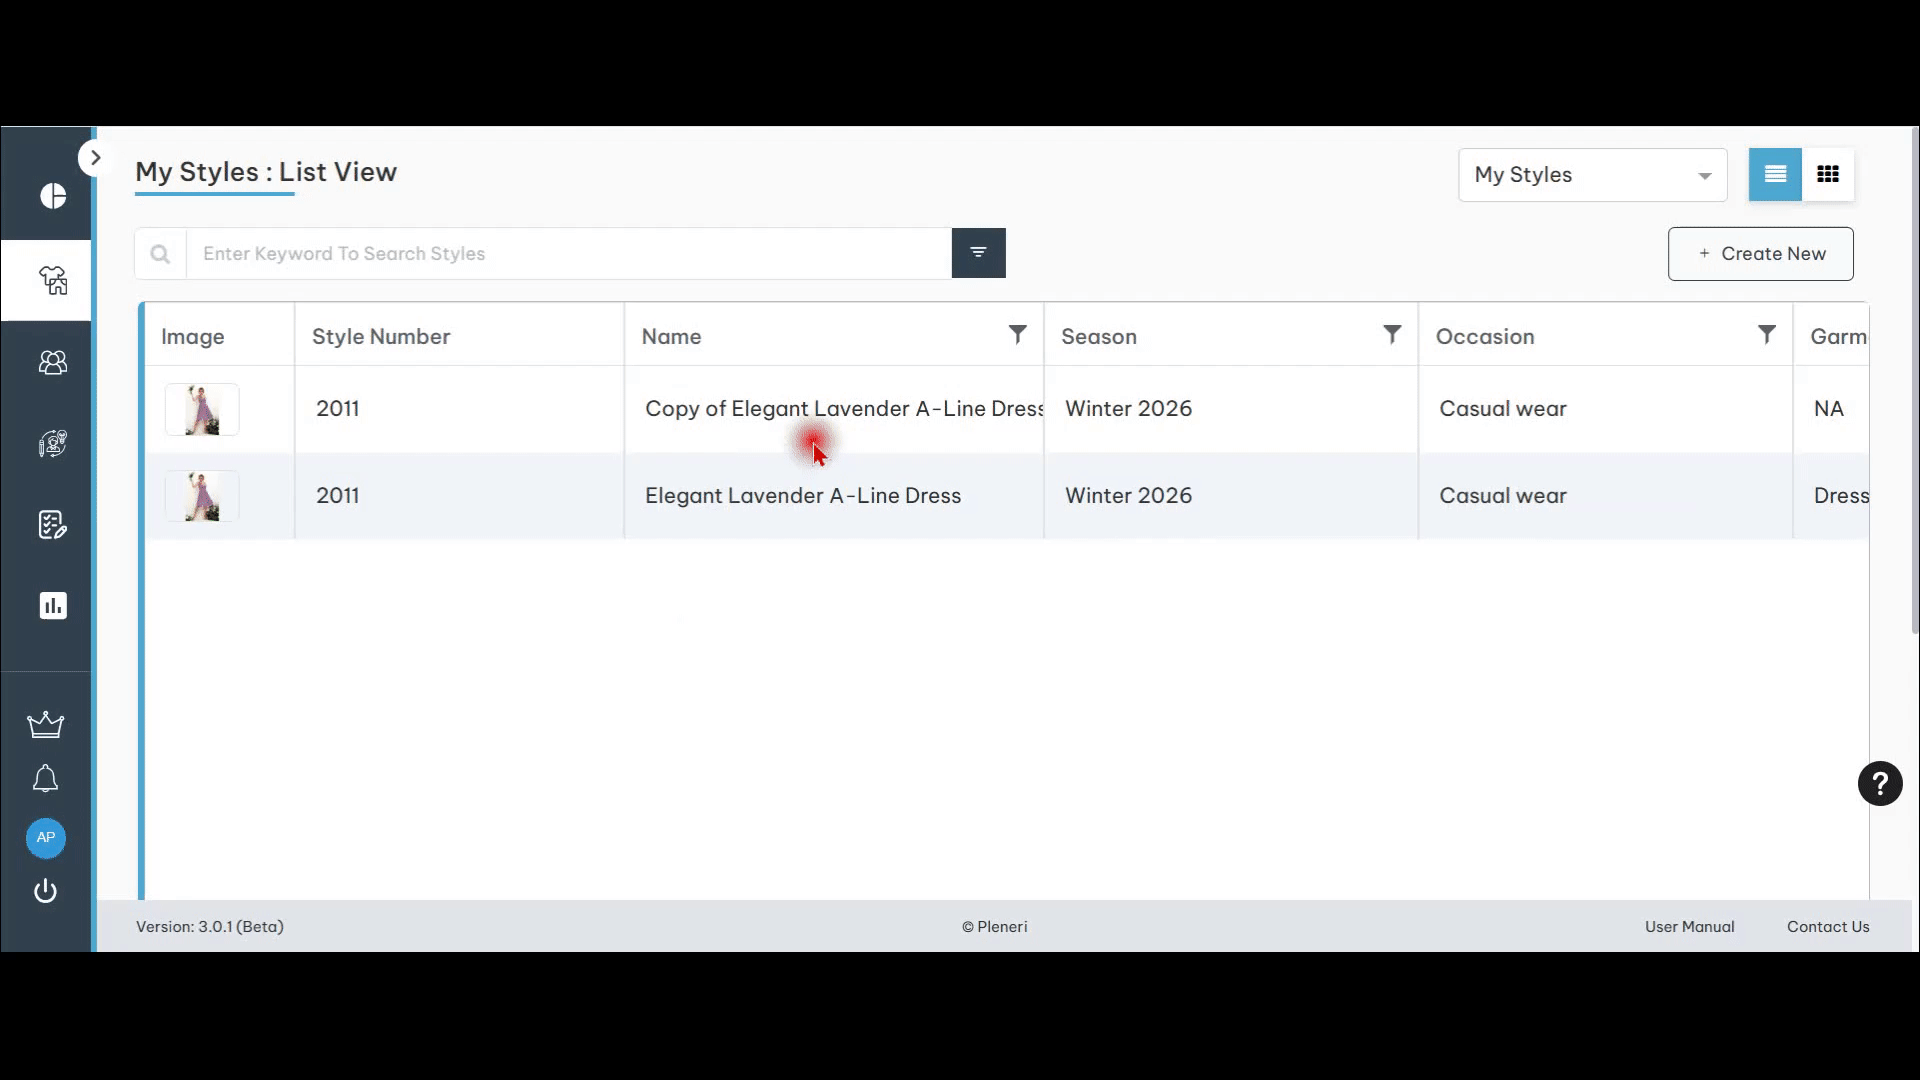
On clicking Create, the page is redirected to My Styles : List View page
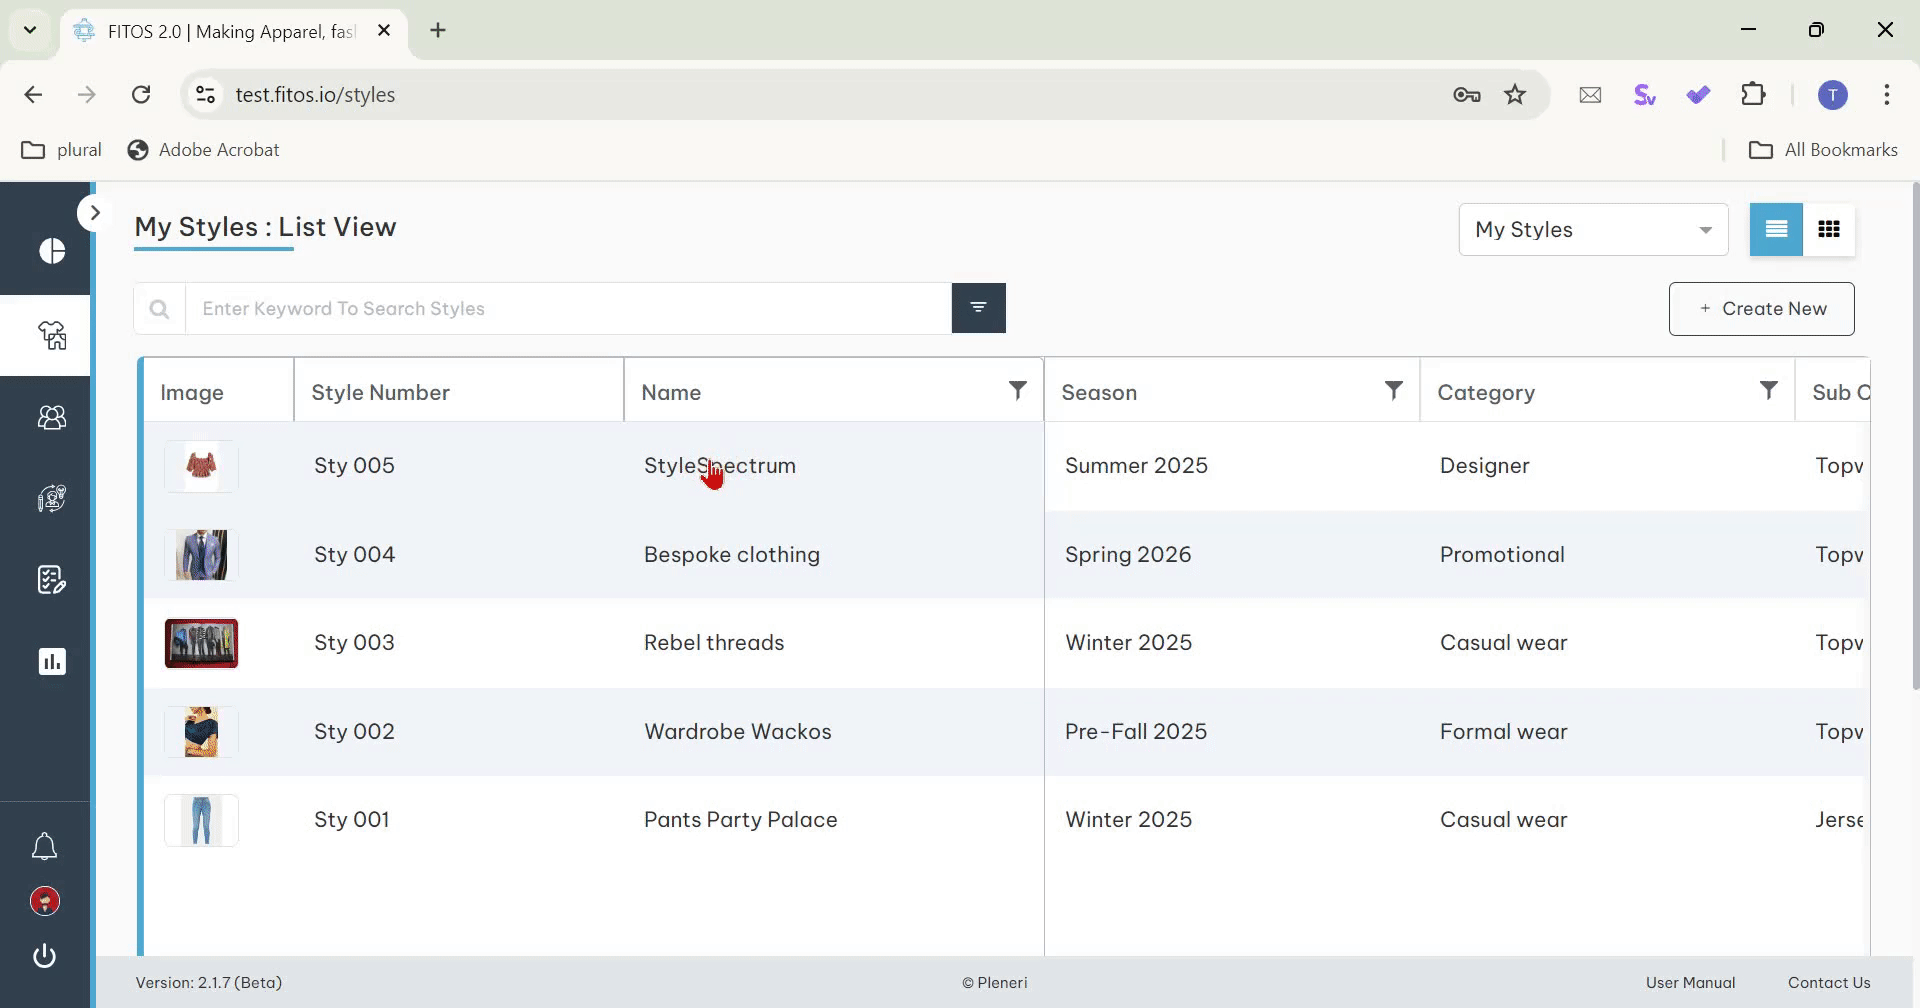
Created Styles will be shown in My Styles : List View page as below
Created Styles will be shown in My Styles : Card view page as below
Edit Style Details

There are 3 ways to edit Styles.
Click on the Edit icon (highlighted in the screenshots below) in My Styles: List view screen:
Second way is to click at the top of View Style details screen to open the Style in edit mode.
Third possibility is to click on edit Styles is by clicking on edit button from My Styles: Card view
Style – In Style Edit mode, all fields except ID can be edited. The form opens as shown below. Style is a unique, system generated Identifier.
Click on edit button which is at top right side of the page to add or update values in Style tabs
BOM : click on BOM tab
Click on +Add New button
Clicking on +Add New button will open Add BOM popup
Clicking on +Add New button will open Add BOM popup of selected Material and required values
Colorways : Click on Colorways tab
Click on +Add New button
Clicking on +Add New button will open Add Colorways button Colorways button
Enter required palettes from popup
Click on Add Colorways button
Clicking on Add Colorways button will add selected palettes in Colorways tab
Measurements
Click on the ‘Generate Measurements‘ button
Clicking on the ‘Generate Measurements‘ button will display specific Points of Measure (POM) in a popup window
Click on Save button to add selected Points of Measure (POM) to the Measurement table
If the user needs to select only specific Points of Measure (POM) from the popup, they must first click the ‘Deselect All’ checkbox and then choose the required POMs
Click the ‘Add New‘ button if the user wants to add new measurements.
Add the field values as shown below and click on Add Measurements button
Clicking on Add Measurements button will add selected POM in the table
Note: The Size Configuration and Size Range shown here come from Style Tab. If you would like to update this data, please change them in Style tab.
- Pattern : click on Pattern tab
- click on Upload button and select required image
- Click on Upload button
- Clicking on Upload button will add CAD Pattern in Pattern tab
- Click on +Add New button
- Click on +Add New button and enter required values
- Click on Add Pattern button
- User can able to change the order of patterns
Construction
- Click on +Add New button
- Clicking on +Add New button will open Create Operation popup -> fill all the required fields and click on Add button
- Clicking on Add button will add the entered Operation in the Construction table
- Attachments : click on Attachments tab
- Click on +Add New button
- Click on Upload button and select required image
- Click on Add Attachment button
- Delete Styles
Delete Styles

- There are 3 ways to delete Style
- First possibility to delete Style is by clicking on Delete button (highlighted in the screenshot below) from My Styles: List view page
- Second possibility is by clicking on Delete button (highlighted in the screenshots below) which is at top right side of Style Details page in view mode
- Third possibility is by clicking on Delete button (highlighted in the screenshot below) on the card in My Styles : Card view page
- Search Functionality : The search functionality allows users to find specific items using both list view and card view display options. Users can choose their preferred view to explore search results in a format that best suits their needs.
- Search functionality in My Styles: List View
- Enter keyword in search bar to filter required item
- Search functionality in My Styles: Card View
- Enter keyword in search bar to filter required item
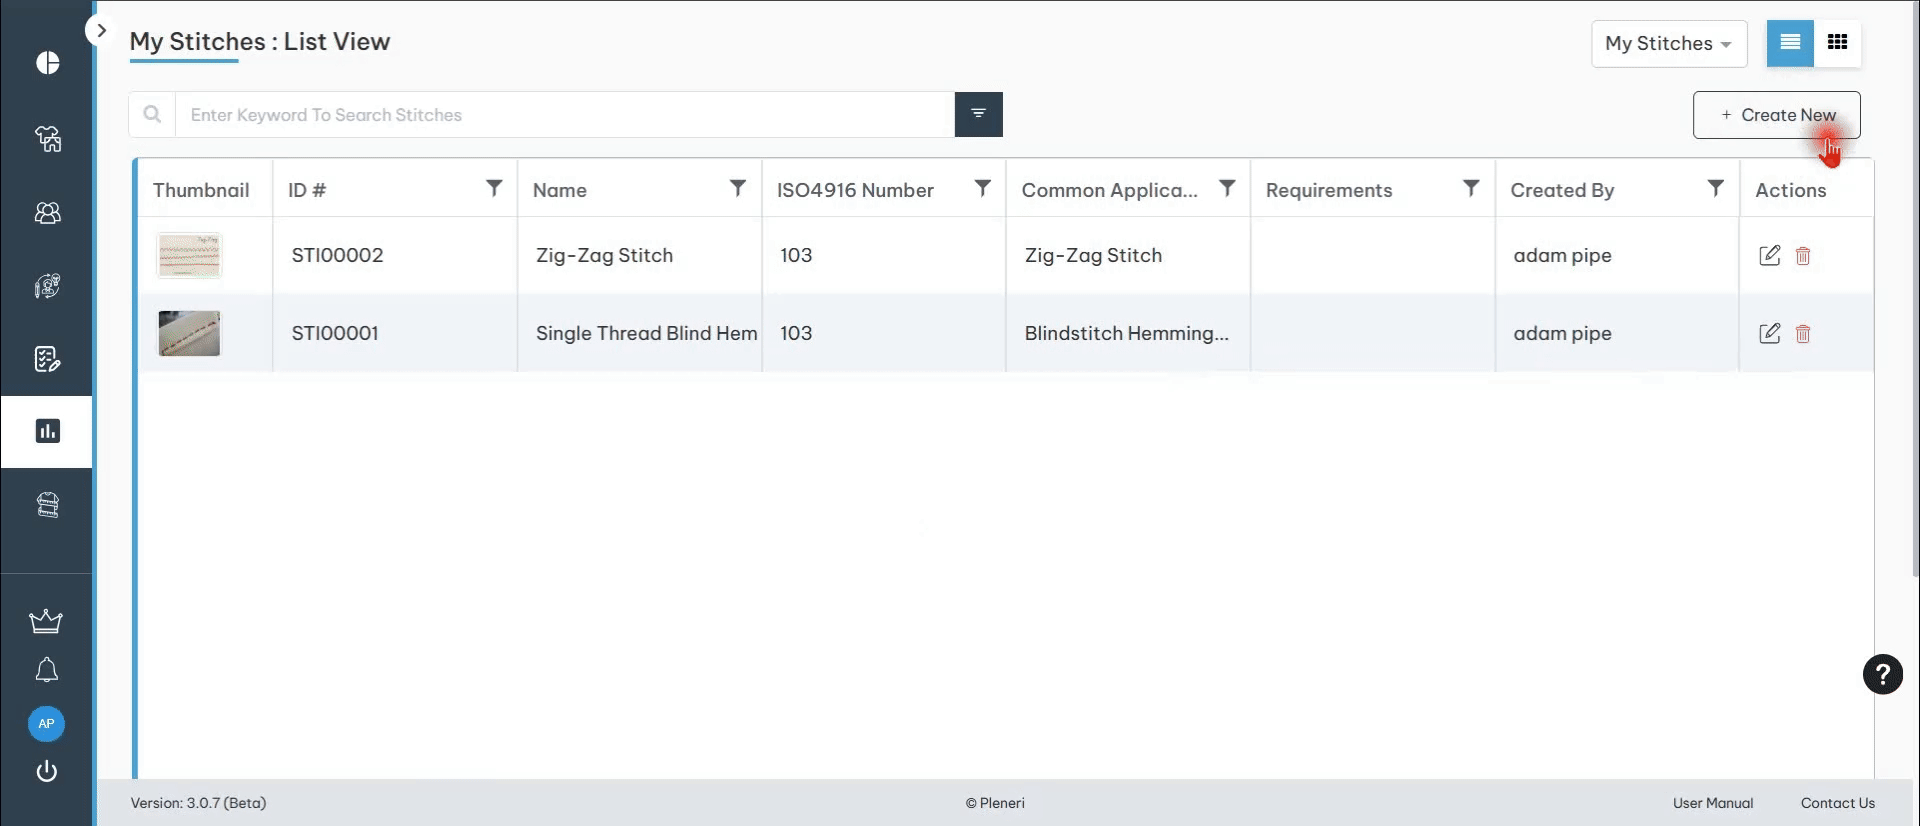
Generate Techpack
There are 3 ways to generate Techpack.
- The first possibility to generate Techpack is available in the My Styles : List View by clicking on Techpack button (highlighted in the screenshot below) which is showing in Actions column
- Second is to click on Techpack button (highlighted in the screenshot below) which is in the view/edit Style Details screen, at the top of the page.
- The third possibility to generate Techpack is available in the My Styles : Card View by clicking on three dots which is showing at bottom of the card and click on Generate Techpack button (highlighted in the screenshot below)


Invite Users

- Click on the “Invite Team Members” button on the My Team page.
- Enter the email id of Team Member to whom user want to Invite and click on Send Invite button
- Invited User will receive an email to accept the invite.
- Clicking on Accept Invite button will redirect the user to the registration page.
- After filling the fields and clicking on Sign Up button will redirect to login page
- After entering registered Email and Password fields click on Let’s Go! button will redirect to Verification Code page.
- Enter the Verification code received on the registered email.
- clicking on Verify Code button will redirect to Post login page The organization will be the organization of the user who sent the invite. This is fixed and not-editable.
Note: For an existing user, he/she is redirected to the login page.
Add Collaborators

- There are two ways to add Collaborators
- Click on the + icon (highlighted in the screenshots below) in My Styles: Card view screen:
- Second way is to click on the icon (highlighted in the screenshots below) in Style Details page in view mode
- Clicking on add Collaborator button will open a popup window, where user can click on dropdown then select the collaborator and click on Save button
- clicking on Save button will show view and edit button
- clicking on pen icon (which is highlighted below) and click on Save button will get permission to the collaborator to edit the Style
Note : Enabling the pen icon will get permission to the collaborator to edit the style and disabling the pen icon will get view only permission to the style
Click on dropdown which is at top right side of My Styles : List view / Card view page then select Shared with me will show the shared style
Discussion : Clicking on Discussion icon will allow users can chat on shared style on Discussion Board
Create Material

- Click on left side menu -> click on Digital Library -> click on Materials
- clicking on Materials will navigate to Material Library : List View page
- Create Materials : Create Materials can be done in two ways
- First possibility to Create Material is by clicking on +Add New button (highlighted in the screenshot below) from Material Library : List view page
- Second possibility to Create Material is by clicking on +Add New button (highlighted in the screenshot below) from Material Library : Card view page
- Click on +Create New button will open Create New : Material page
- Select Material Type from dropdown
- When user select Fabric as material type , will show Category list (as shown in the screenshot below)
Specifications
- when user select category as Woven, will show below Sub-Category (as shown in the screenshot below)
- If user select category as Knit, will show Sub-Category (as shown in the screenshot below)
- If you select category as Natural,
- If you select category as Synthetic,
- If the user needs to enter the material composition, they must select the material type as fabric.
- Click on dropdown -> select any Fabric type -> add percentage
- Total percentage should be 100
- User can add more than one Fabric type by clicking on + button
- If you select material type as Leather
- If you select material type as Trims
- If user select category as Zipper
- If user select category as buttons
- If we select material type as Product Packaging
- Sub-Category
- If user select Category as Polybag will show Sub-Category (as shown in the screenshot below)
- Upload Image
- Click on Create button will create new material as shown below
Edit Material Details
There are three ways to edit Materials
- First possibility to edit Materials is by clicking on Edit button (highlighted in the screenshot below) from Material Library: List view
- Second possibility is by clicking on Edit button (highlighted in the screenshot below) which is at top right side of Material Details view mode
- Third possibility is by clicking on Edit button (highlighted in the screenshot below) on the card from Material Library : Card view page
Add Colors
- Click on +Add New button
- Click on Add to Color button
Add Suppliers
- Click on +Add New button
- Click on Add Supplier button
Delete Material Details


There are 3 ways to delete material .
- First possibility to delete Material is by clicking on Delete button (highlighted in the screenshot below) from Material Library: List view
- Second possibility is by clicking on Delete button (highlighted in the screenshots below) which is at top right side of Material Details view mode
- Third possibility is by clicking on Delete button (highlighted in the screenshot below) on the card in Material Library : Card view page
Create Supplier

- Click on left side menu -> click on Digital Library -> click on suppliers
- click on +Create New button to create new Suppliers Library
- Create New: Suppliers form
- select classification
- If user selects classification as Agent
- If user selects classification as Factory
- If user selects classification as Raw Material Supplier
- Enter all the fields and click on Create button
- Created suppliers will be shown in My Suppliers : Card view page as below
- Created suppliers will be shown in My Suppliers : List view page as below
Edit Suppliers
There are three ways to edit Suppliers
- First possibility to edit Supplier is by clicking on Edit button (highlighted in the screenshot below) from My Suppliers : List view
- Second possibility is by clicking on Edit button (highlighted in the screenshots below) which is at top right side of Supplier Details in view mode
- Third possibility is by clicking on Edit button (highlighted in the screenshot below) on the card in Supplier Library : Card view page
Delete Suppliers

There are 3 ways to delete Suppliers.
- First possibility to delete Material is by clicking on Delete button (highlighted in the screenshot below) from Material Library: List view
- Second possibility is by clicking on Delete button (highlighted in the screenshot below) which is at top right side of Supplier Details page view mode
- Third possibility is by clicking on Delete button (highlighted in the screenshot below) on the card in Supplier Library : Card view page
Create Color
- Click on left side menu -> click on Digital Library -> click on Colors
- click on + Create New button to create new Color Library
- select classification
- If user select classification as Custom
- If user select classification as Print and Pattern, then the user needs to upload an image of the print and pattern type color.
- If user select classification as Solid
- User can select his required color
- Enter all required fields and click on Create button
- Created Colors will be shown in Color Library : Card view page as below
- Created Colors will be shown in Color Library : List view page as below
Edit Colors

There are three ways to edit Color Library
- First possibility to edit Colors is by clicking on Edit button (highlighted in the screenshot below) from Colors Library : List view page
- Second possibility is by clicking on Edit button (highlighted in the screenshot below) which is at top right side of Color Details page in view mode
- Third possibility is by clicking on Edit button (highlighted in the screenshot below) on the card in Color Library : Card view page
- Edit the required fields and click on Update button
Delete Colors

There are 3 ways to delete Colors.
- First possibility to delete Colors is by clicking on Delete button (highlighted in the screenshot below) from Color Library : List view page
- Second possibility is by clicking on Delete button (highlighted in the screenshot below) which is at top right side of Color Details view mode
- Third possibility is by clicking on Delete button (highlighted in the screenshot below) on the card in Color Library : Card view page
Create Palette
- Click on left side menu -> click on Digital Library -> click on Palettes
Palettes : There are two ways to create Palettes
- First possibility to create Palette is by clicking on + Create New button (highlighted in the screenshot below) from Palette Library: List view
- Second possibility is by clicking on +Create New button (highlighted in the screenshot below) which is at top right side of Palette Library : Card view
- Create Palette form
- Enter Palette Name , Description fields and click on + Add Palette Color button
- click on pen icon to select required color
- Download Palette color : click on download icon to download palette color
- Download the image
- Download file will be in downloads folder
- clicking on +Add Palette Color button will allow to add another palette color
- Click on Create button to create new palette
- Created Palettes will be shown in Palette Library : Card view page as below
- Created Palettes will be shown in Palette Library: List View page as below
Edit Palettes
There are three ways to edit Palettes
- First possibility to edit Palette is by clicking on Edit button (highlighted in the screenshot below) from Palette Library: List view
- Second possibility is by clicking on Edit button (highlighted in the screenshot below) which is at top right side of Palette Details in view mode
- Third possibility to edit Palettes (highlighted in the screenshots below) is by clicking on Edit button from Palette Library: Card view
Delete Palettes

There are 3 ways to delete Palettes.
- First possibility to delete palette is by clicking on Delete button (highlighted in the screenshot below) from Palette Library: List view
- Second possibility is by clicking on Delete button (highlighted in the screenshot below) which is at top right side of Palette Details view mode
- Third possibility is by clicking on Delete button (highlighted in the screenshots below) on the card in Palette Library : Card view page
Create Seams

- Click on left side menu -> click on Digital Library -> click on Manufacturing Processes -> Seams
- Create Seams: There are two ways to create Seams
- First possibility to create seams is by clicking on + Create New button (highlighted in the screenshot below) from My Seams : List view
- Second possibility is by clicking on +Create New button (highlighted in the screenshot below) which is at top right side of Seams Library : Card view
- Create Seam form:
- After filling all the required fields and uploading the file click on Create button
- Created Seam will be shown in My Seams: List view page as below
- Created Seam will be shown in My Seams: Card view page as below
Edit Seams

There are three ways to edit Seams Library
- First possibility to edit Seams is by clicking on Edit button(highlighted in the screenshot below) from My Seams: List view
- Second possibility is by clicking on Edit button (highlighted in the screenshot below) which is at top right side of Seams Details view mode
- Third possibility is by clicking on Edit button (highlighted in the screenshot below) on the card from My Seams : Card view page
Delete Seams

There are 3 ways to delete Seams.
- First possibility to delete Seams is by clicking on Delete button (highlighted in the screenshot below) from My Seams : List view
- Second possibility is by clicking on delete button (highlighted in the screenshot below) which is at top right side of Seams Details in view mode
- Third possibility is by clicking on delete button (highlighted in the screenshots below) on the card in My Seams : Card view page
Create Stitches

- Click on left side menu -> click on Digital Library -> click on Manufacturing Processes -> Stitches
- Create Stitches: There are two ways to create Stitches
- First possibility to create stitches is by clicking on + Create New button (highlighted in the screenshot below) from My Stitches : List view
- Second possibility is by clicking on +Create New button (highlighted in the screenshot below) which is at top right side of My Stitches : Card view
- Create Stitch form
- Enter all the required fields -> Upload files of Upload Top View File and Upload Bottom View File -> click on Create button
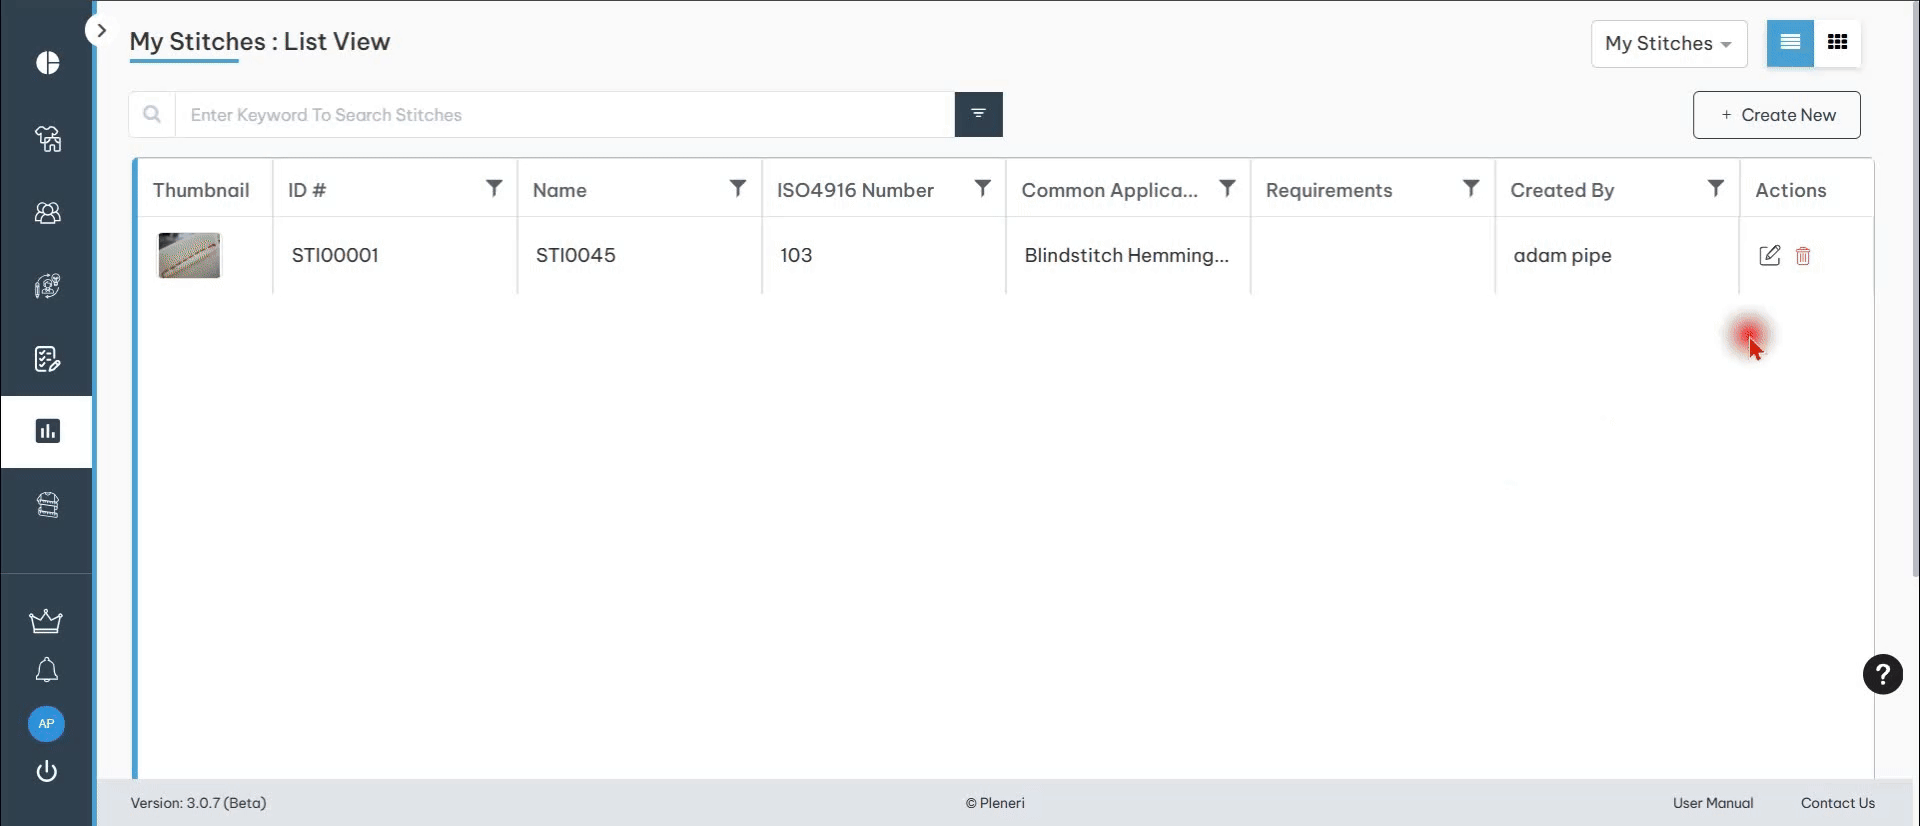
- Created Stitches will be shown in My Stitches : List view page as below
- Created Stitches will be shown in My Stitches : Card view page as below
Edit Stitches
There are three ways to edit Stitches Library
- First possibility to edit Stitches is by clicking on Edit button (highlighted in the screenshot below) from My Stitches: List view
- Second possibility is by clicking on Edit button (highlighted in the screenshot below) which is at top right side of Stitches Details in view mode
- Third possibility is by clicking on Edit button (highlighted in the screenshot below) on the card in My Stitches : Card view page
Delete Stitches
There are 3 ways to delete Stitches.
- First possibility to delete Stitches is by clicking on Delete button (highlighted in the screenshot below) from My Stitches: List view
- Second possibility is by clicking on delete button (highlighted in the screenshot below) which is at top right side of Stitches Details in view mode
- Third possibility is by clicking on delete button (highlighted in the screenshots below) on the card in My Stitches : Card view page
Create Images & Documents

- Click on left side menu -> click on Digital Library -> click on Images and Documents
- Create Images & Documents : There are two ways to create Images & Documents library
- First possibility to create Images & Documents is by clicking on + Create New button (highlighted in the screenshot below) from Images & Documents : List view
- Second possibility is by clicking on +Create New button (highlighted in the screenshot below) which is at top right side of Images & Documents : Card view page
- Create Image and Document
- Select classification
- Select classification – Documents drop down list
- select classification-Images drop down list
- When user select Lab Reports which is in Documents as classification, page will show as below
- Created Images & Documents will be shown in Images & Documents : Card view page as below
- Created Images & Documents will be shown in Images & Documents : List view page as below
Edit Images & Documents

There are three ways to edit Images & Documents
- First possibility to edit Images & Documents is by clicking on Edit button(highlighted in the screenshot below) from Images & Documents: List view page
- Second possibility is by clicking on Edit button (highlighted in the screenshot below) which is at top right side of Image & Document Library in view mode
- Third possibility is by clicking on Edit button (highlighted in the screenshot below) on the card in Images & Documents : Card view page
Delete Images & Documents
 There are 3 ways to delete Images & Documents.
- First possibility to delete Images and Documents is by clicking on Delete button (highlighted in the screenshot below) from Images & Documents: List view page
- Second possibility is by clicking on Delete button (highlighted in the screenshot below) which is at top right side of Image & Document Library in view mode
- Third possibility is by clicking on Delete button (highlighted in the screenshots below) on the card from Images & Documents : Card view page
Create Ideas

- Create Ideas is done by clicking on + Create New button (highlighted in the screenshot below ) from Ideas : Card View
- Create Idea form :
- Create New Inspiration:
- Click on + button
- Click on Type field and select any type from dropdown
- Selecting type of inspiration will increase the count of the corresponding inspiration in the related icon panels
- After entering the required fields and upload the image -> click on Create button
Edit Ideas
Edit Ideas can be done by clicking on Edit button ( (highlighted in the screenshot below ) from Ideas : Card View
Delete Ideas

There are 2 ways to delete Ideas
- First possibility to delete Ideas is by clicking on Delete button (highlighted in the screenshot below) from Ideas : card view page
- Second possibility is by clicking on Delete button (highlighted in the screenshot below) which is at top right side of Ideas Library in edit mode
Create Product Line

Add Style relationship to Product Line

- Open Product Line in view mode and click on Style tab
- click on Edit button (highlighted in the screenshot below)
- click on Add New button (highlighted in the screenshot below)
- Clicking on Add New button will open Add Style popup with all the Styles , select required style and click on Add Style button
- Selected style added to Product Line
- Remove Style from Product Line
- Click on Delete button (highlighted in the screenshot below)
- After clicking on Delete button, will show confirmation popup
- Click on Confirm button in the popup -> Clicking on Confirm button will show success toaster message
Edit Product Line
- First possibility to edit Product Line is by clicking on Edit button(highlighted in the screenshot below) from Product Line : List View Edit Product Line : There are 3 ways to edit Product Line
- Second possibility to edit Product Line is by clicking on Edit button (highlighted in the screenshot below) which is at top right side of Product Line in view mode
- Third possibility is by clicking on Edit button (highlighted in the screenshot below) on the card in Product Line : Card View page
- Add Style relationship to Product Line
- Open Product Line in view mode and click on Style tab
- click on Edit button (highlighted in the screenshot below)
- click on Add New button (highlighted in the screenshot below)
- Clicking on Add New button will open Add Style popup with all the Styles , select required style and click on Add Style button
- Selected style added to Product Line
- Remove Style from Product Line
- Click on Delete button (highlighted in the screenshot below)
- After clicking on Delete button, will show confirmation popup
- Click on Confirm button in the popup -> Clicking on Confirm button will show success toaster message
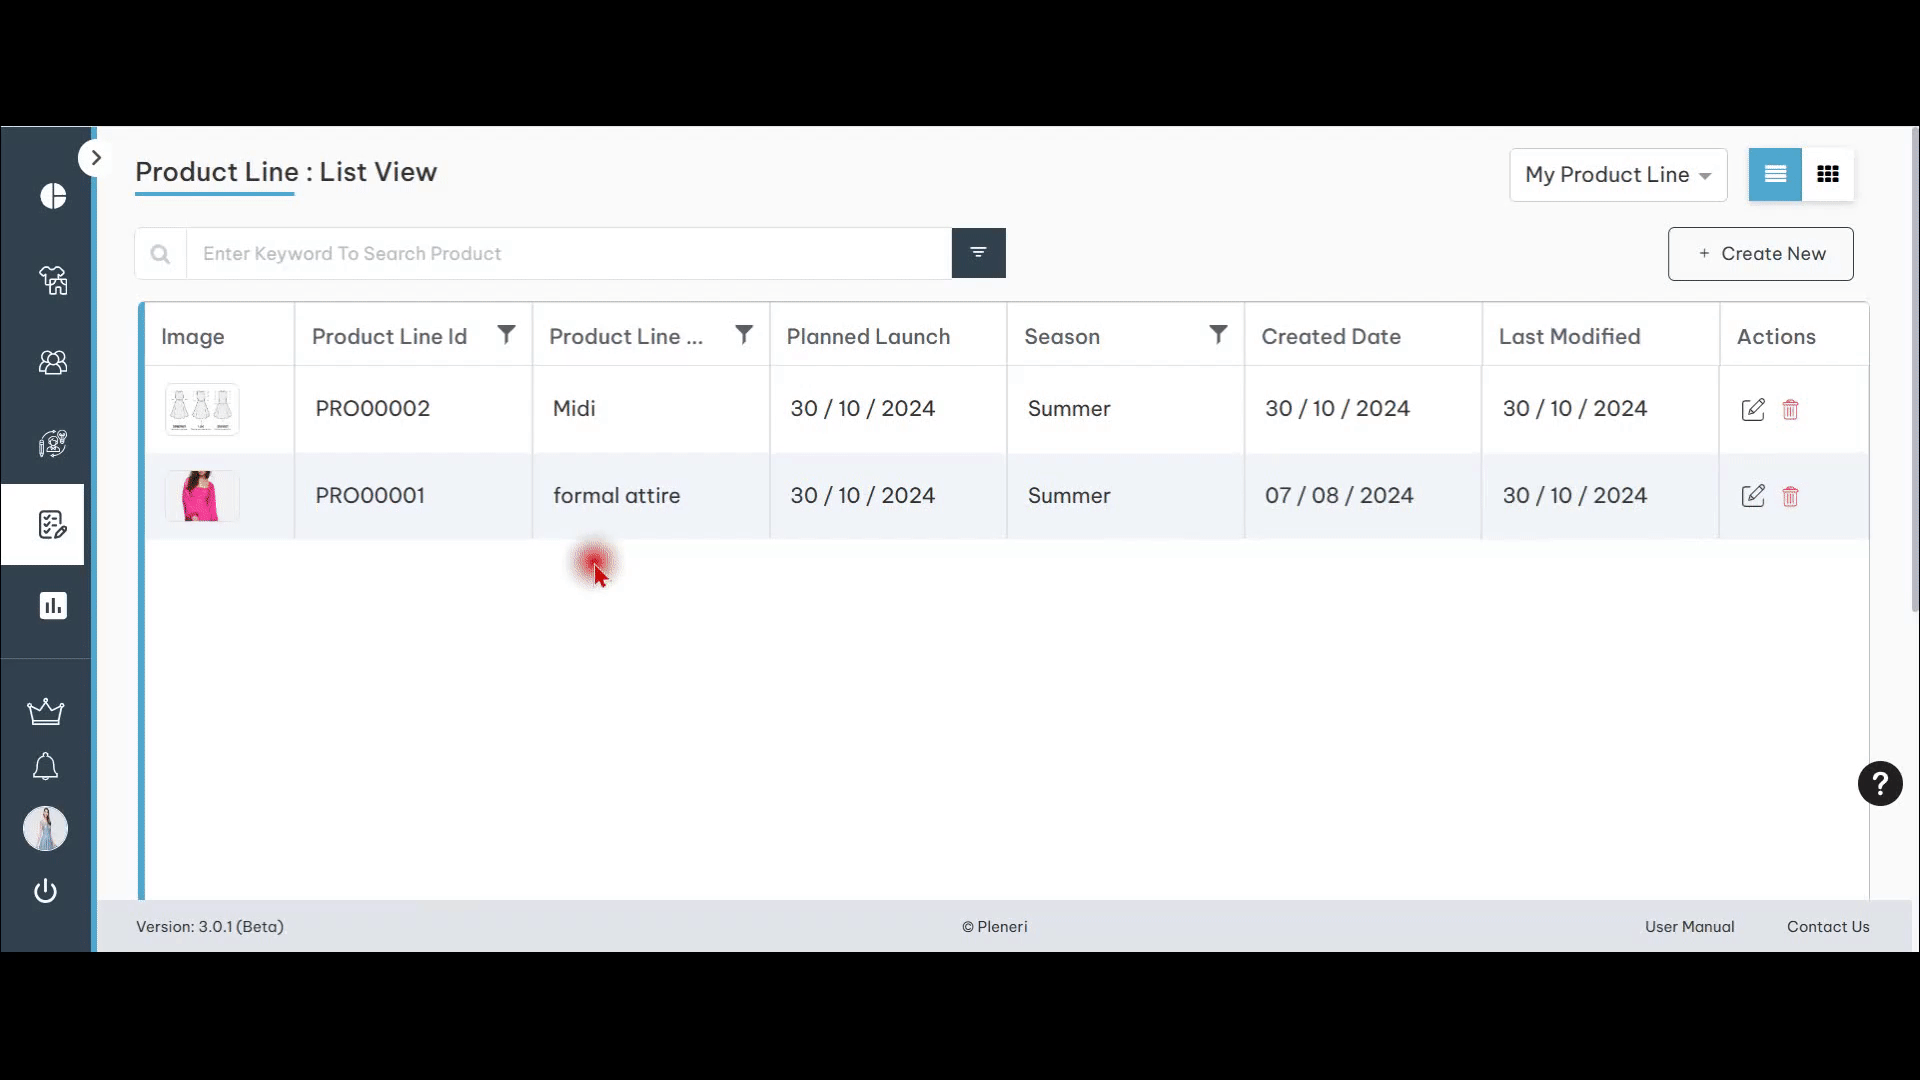
Delete Product Line
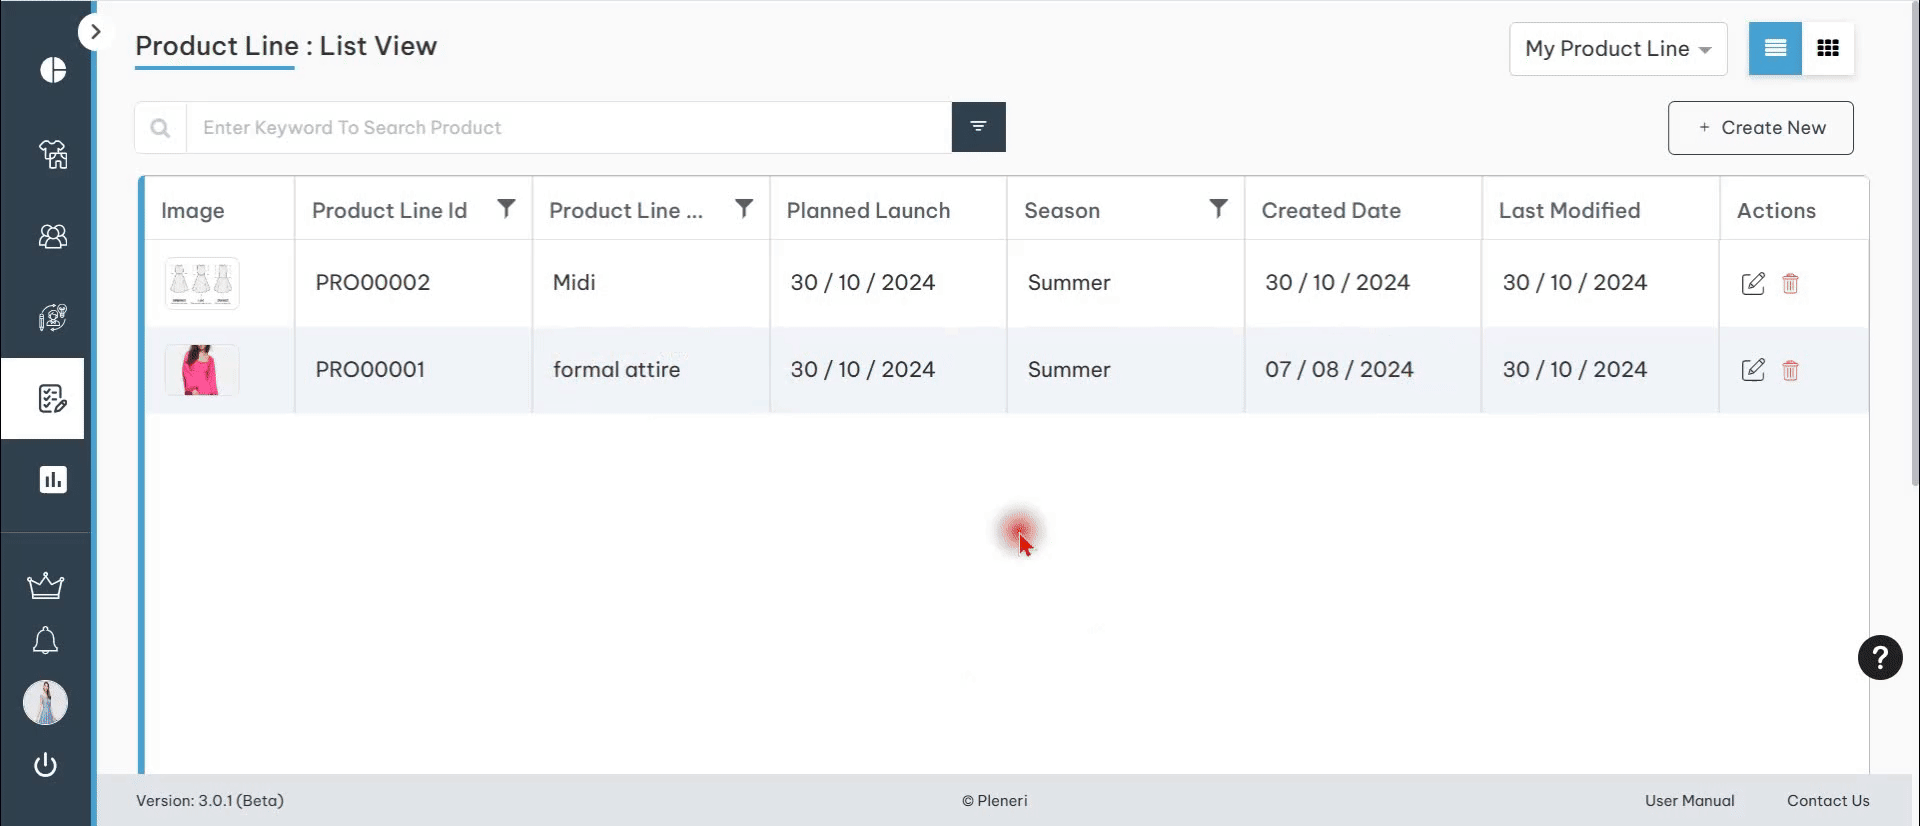
There are 3 ways to delete Product Line
- First possibility to delete Product Line is by clicking on Delete button (highlighted in the screenshot below) from Product Line : List View
- Second possibility is by clicking on delete button (highlighted in the screenshot below) which is at top right side of Product Line in view mode
- Third possibility is by clicking on delete button (highlighted in the screenshots below) on the card in Product Line : Card View page
Create Seasons

- Click on left side menu -> click on Planning -> click on Seasons
There are 2 ways to create Seasons
- First possibility to create Seasons is by clicking on + Create New button (highlighted in the screenshot below) from My Seasons : List view page
- Second possibility is by clicking on +Create New button (highlighted in the screenshot below) which is at top right side of My Seasons : Card View
- Click on +Create New button to navigate to Create Season page
- After entering the required fields , click on Create button
Product Line Added to Season
- Click on left side menu -> click on Planning -> click on Product Line
- Create Product Line : There are two ways to create Product Line
- First possibility to create Product Line is by clicking on + Create New button (highlighted in the screenshot below) from Product Line : List View
- Second possibility is by clicking on +Create New button (highlighted in the screenshot below) which is at top right side of Product Line : Card view
- Clicking on +Create New button will navigate to Create Product Line form
- Create Product Line
- After entering all the fields, click on Create button
Edit Seasons
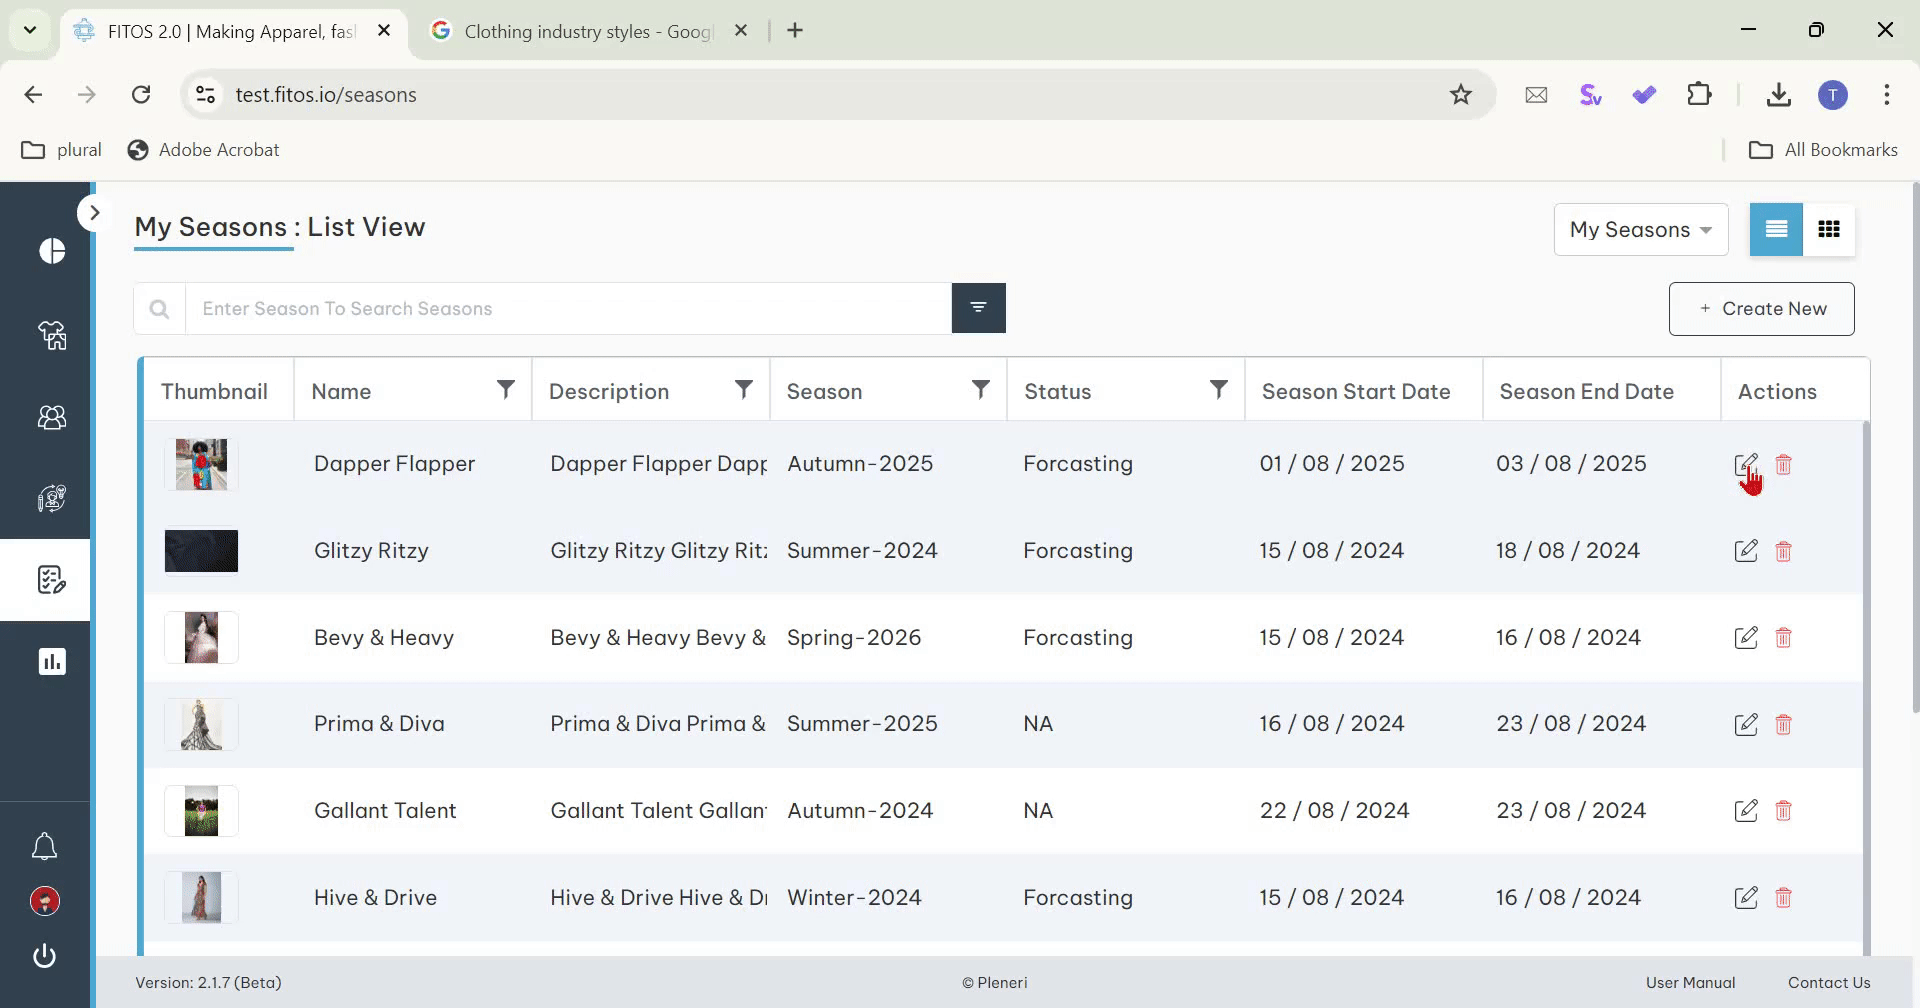
There are 3 ways to edit Seasons
- First possibility to edit Seasons is by clicking on Edit button (highlighted in the screenshot below) from My Seasons : List View
- Second possibility is by clicking on Edit button (highlighted in the screenshot below) which is at top right side of Season Details in view mode
- Third possibility is by clicking on Edit button (highlighted in the screenshot below) on the card in My Seasons : Card View page
Add Product Line relationship to Seasons
- Open Seasons in view mode and click on Product Lines tab
- Click on Edit button (highlighted in the screenshot below)
- Click on Add New button (highlighted in the screenshot below)
- Clicking on Add New button will open Add Product Line popup with all the Product Lines , select required Product Lines and click on Add Product Line button
- Selected Product Line added to Seasons
- Remove Product Line from Seasons
- Click on Delete button (highlighted in the screenshot below)
- After clicking on Delete button, will show confirmation popup
- Click on Confirm button in the popup -> Clicking on Confirm button will show success toaster message
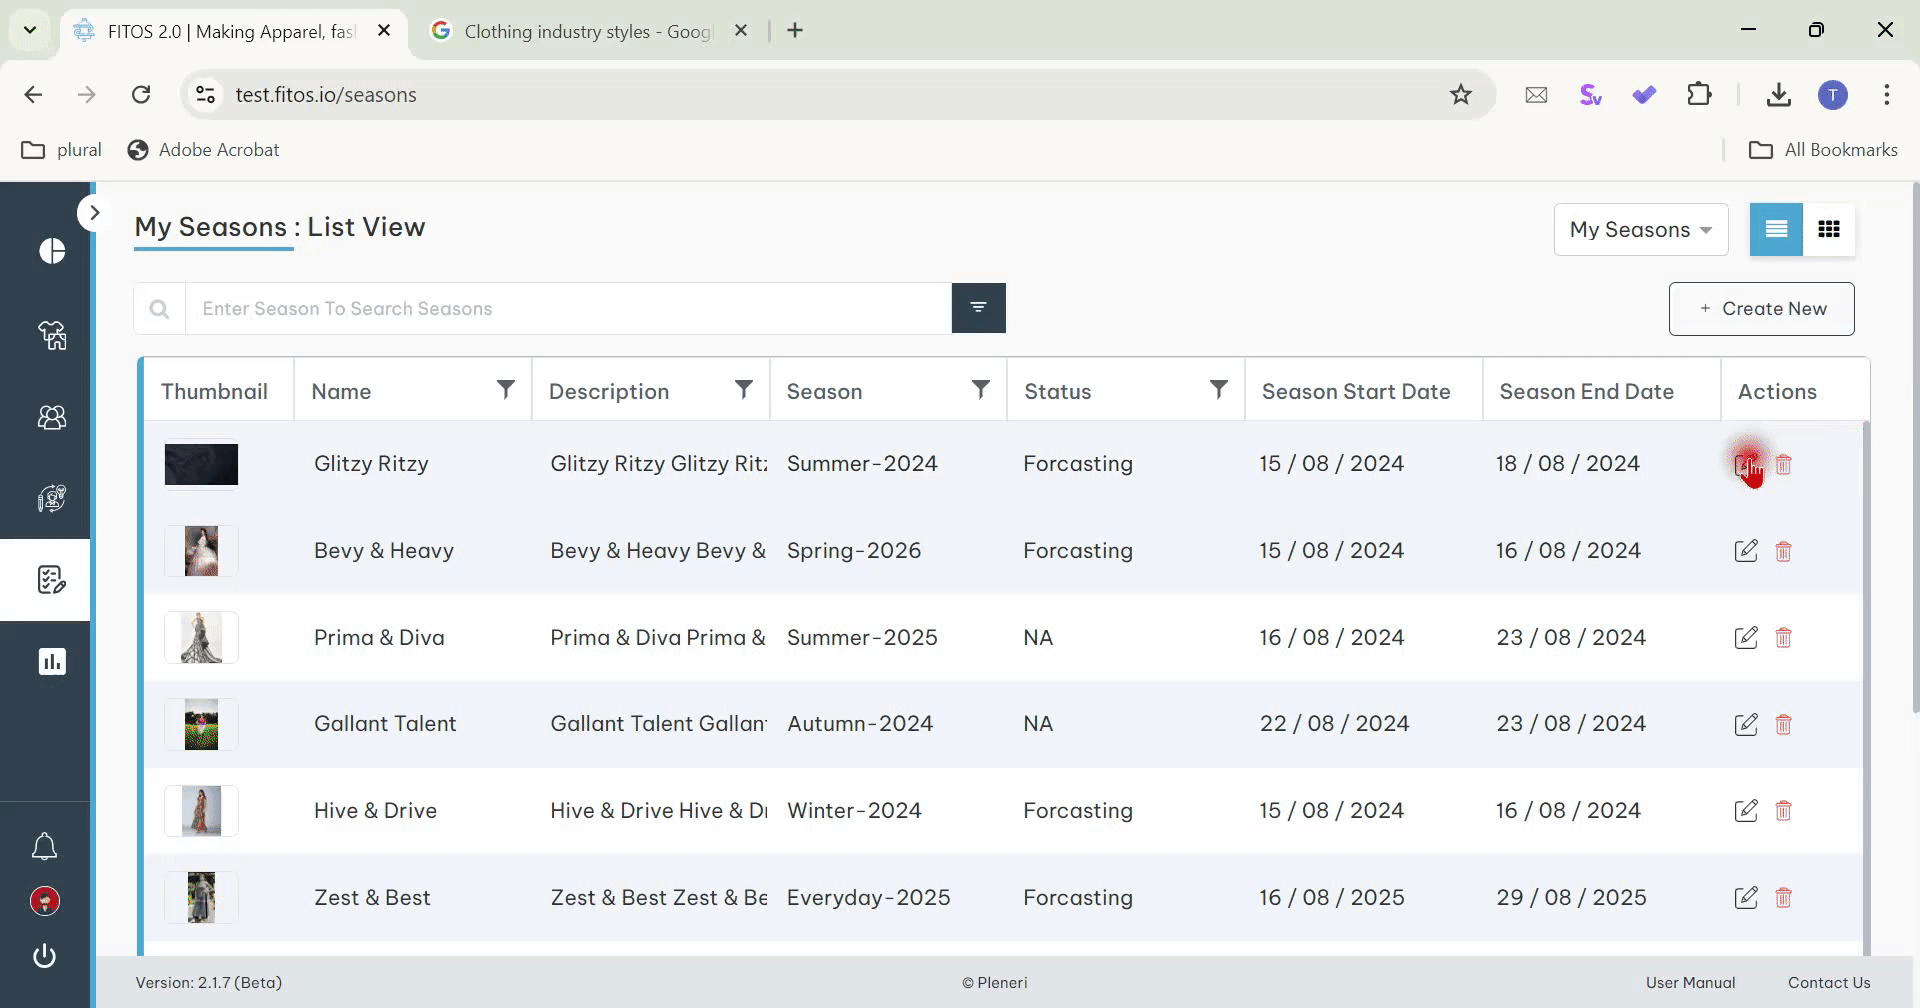
Delete Seasons
There are three ways to delete Seasons
- First possibility to delete Seasons is by clicking on Delete button (highlighted in the screenshot below) from My Seasons : List View page
- Second possibility is by clicking on delete button (highlighted in the screenshot below) which I s at top right side of Seasons Details in view mode
- Third possibility is by clicking on delete button (highlighted in the screenshots below) on the card in My Seasons : Card View page
Search Functionality in all Libraries

Navigate List view – card view